
With Microsoft Outlook rules, you can keep your emails organized and your inbox in tip-top shape. Rules can move emails to folders, play sounds, automatically reply, and much more. We narrowed the list down to some of the best and most practical Outlook rules.
How to Set Up Outlook Rules
The process and options differ slightly between Outlook on Windows versus Mac.
Outlook on Windows
In Outlook on Windows, open the Rules Wizard one of these ways:
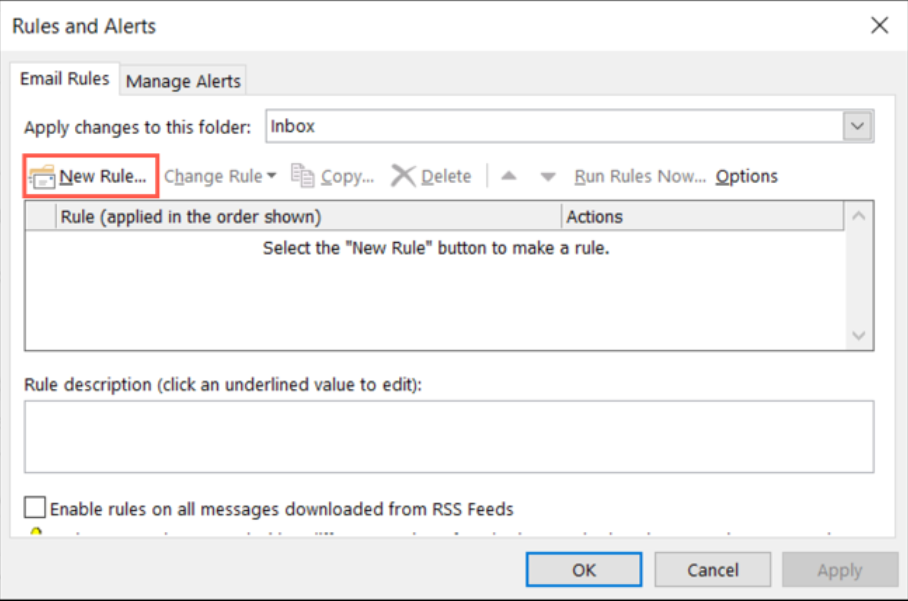
- Go to File > Info and pick “Manage Rules & Alerts.” Then, choose “New Rule.”
- Head to the Home tab from your inbox. Select the Rules drop-down menu in the Move section of the ribbon and pick “Manage Rules & Alerts.” Then, choose “New Rule.”
Outlook on Mac
In Outlook on Mac, open the Rules manager one of these ways:
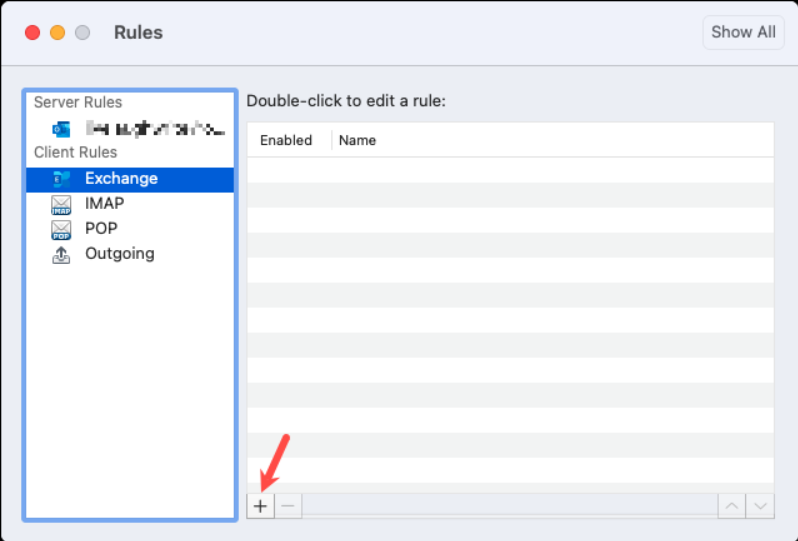
- Go to Outlook > Preferences in the menu bar and select “Rules.” Choose the account on the left if you have more than one. Then, click the plus sign at the bottom of the rule list.
- Head to the Home tab from your inbox. Select the Rules drop-down menu in the Move section of the ribbon and pick “Edit Rules.” Choose the account on the left and click the plus sign at the bottom of the rule list.
Once you have the new rule screen open in your version of Outlook, it’s time to create a rule to take action on your emails automatically.
1. Move Sensitive Messages
You may receive an email that’s marked as confidential, private, or personal. You may not want these types of messages sitting in your inbox, just in case they catch someone’s eye. Why not move them to a specific folder as soon as they arrive?
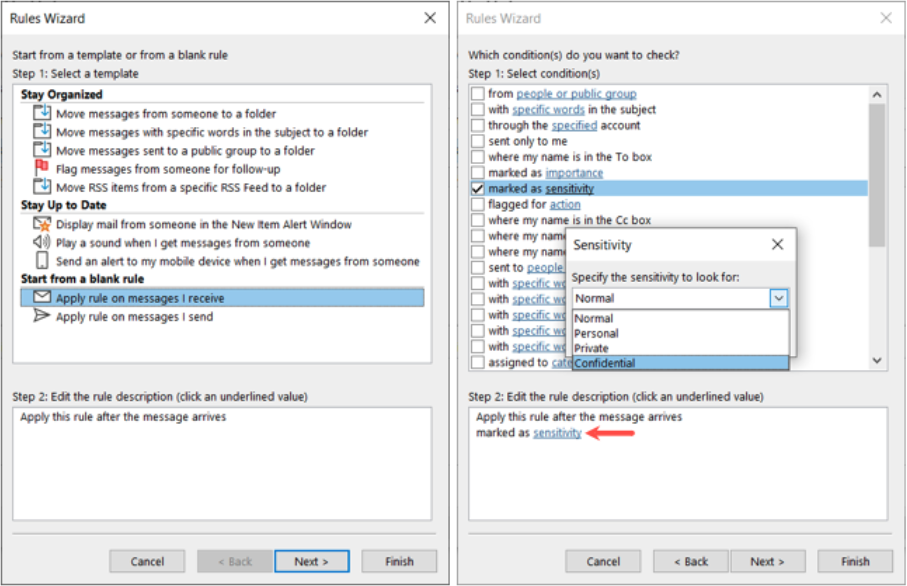
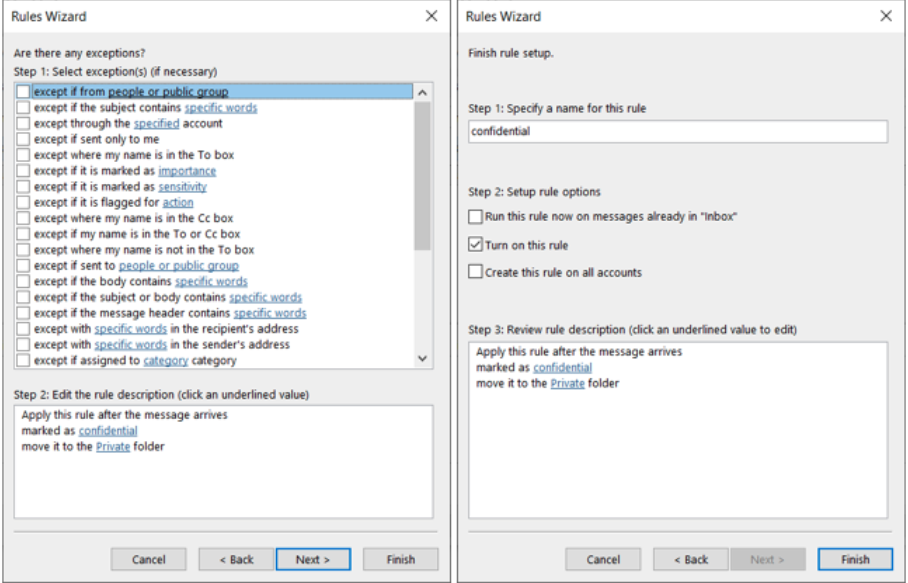
To set up a sensitive message rule on Windows, select “Apply Rule on Messages I Receive” in the blank rule area and click “Next.” Check the box for Marked as Sensitivity. In the Step 2 box at the bottom, click “Sensitivity” and choose the type in the drop-down list. Then, click “OK” and choose “Next.”
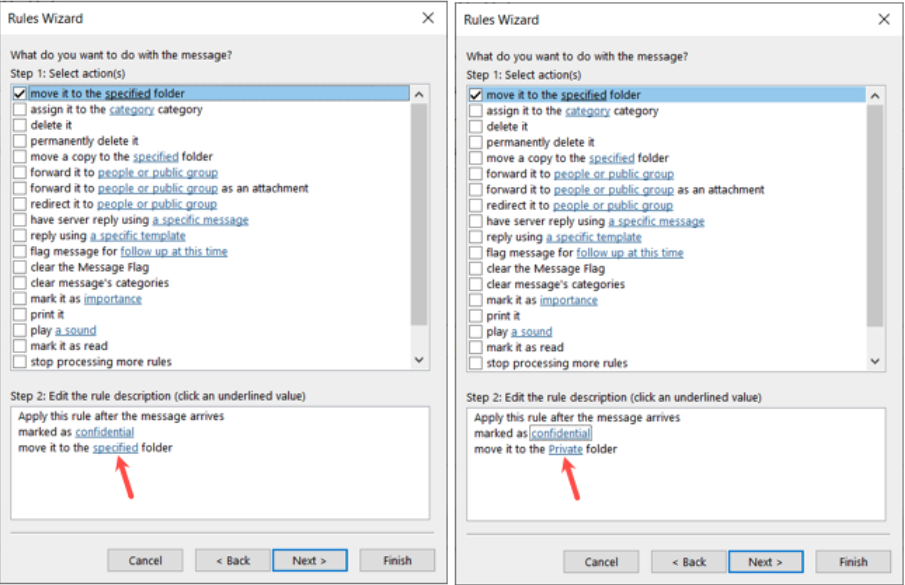
Check the box for “Move it to the Specified Folder.” In the Step 2 box, click “Specified,” choose the folder, and click “OK.” Select “Next.”
Optionally select any exceptions. Then, give your rule a name and check the box for Turn on This Rule. You can check one of the other boxes if you wish and click “Finish” to apply the rule.
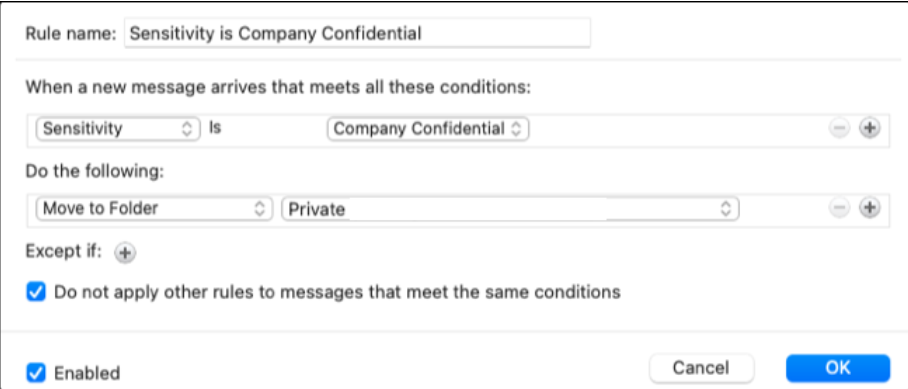
To create a sensitive message rule on Mac, select “Sensitivity” in the first drop-down list for when a message arrives. In the drop-down menu to the right, choose the type.
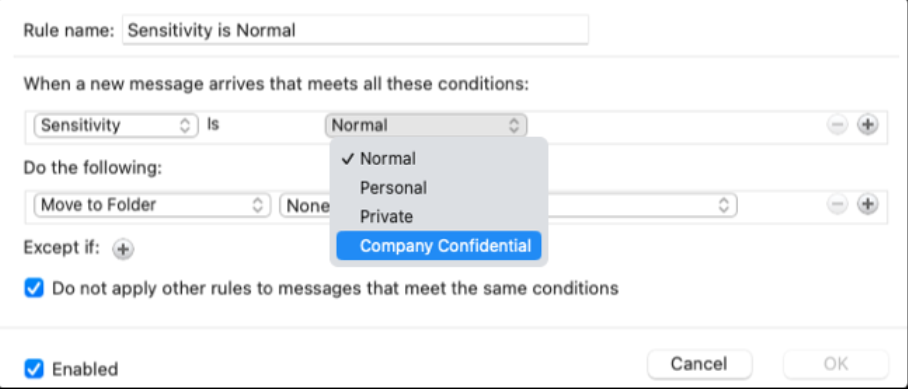
Choose “Move to Folder” in the first drop-down box below “Do The Following” and pick the folder to the right.
You can use the default name or change it if you like. Then, check the box for Enabled, optionally check the box to not apply other rules, and click “OK” to apply the rule.
2. Handle Automatic Replies
Another type of email that takes up space in your inbox is an automatic reply. You might receive one if someone’s out of the office or if you contact a company. While these replies can be useful, they’re normally not actionable. You may want to move them to a folder to view later, mark them as low priority, or simply mark them as read.
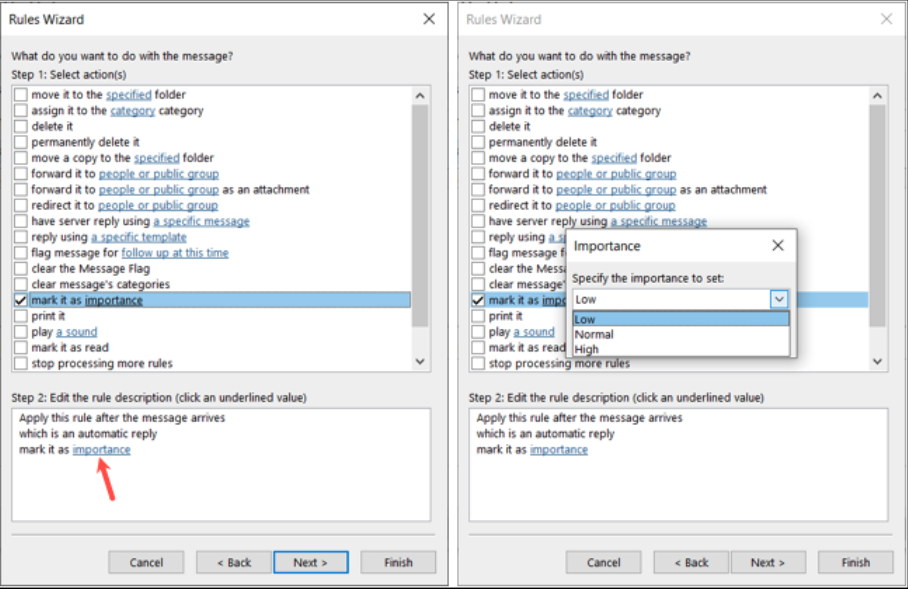
On Windows, start setting up an automatic reply rule by selecting “Apply Rule on Messages I Receive” in the blank rule area and clicking “Next.” Check the box for Which is an Automatic Reply. Then, choose “Next.”
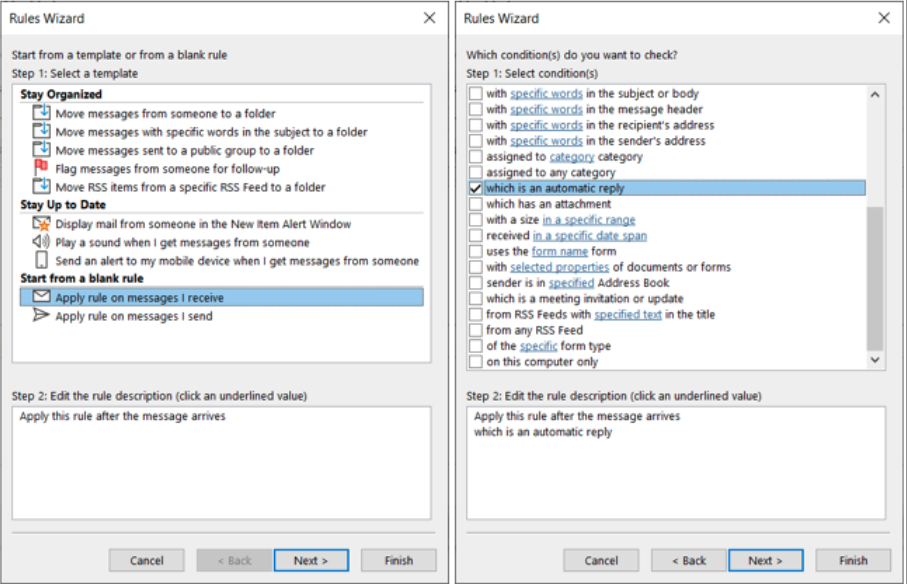
Check the box for the action you want to take and pick the option in the Step 2 box if applicable. For instance, to mark it low priority, check the box for Mark it as Importance, click “Importance,” and choose “Low.” Then, click “OK” and “Next.”
Add any exceptions in the following area, click “Next,” and complete the rule.
If you’re using a Mac and want an automatic reply rule, select “Kind” in the first drop-down list for when a message arrives. In the drop-down menu to the right, choose “Automatic Reply.”
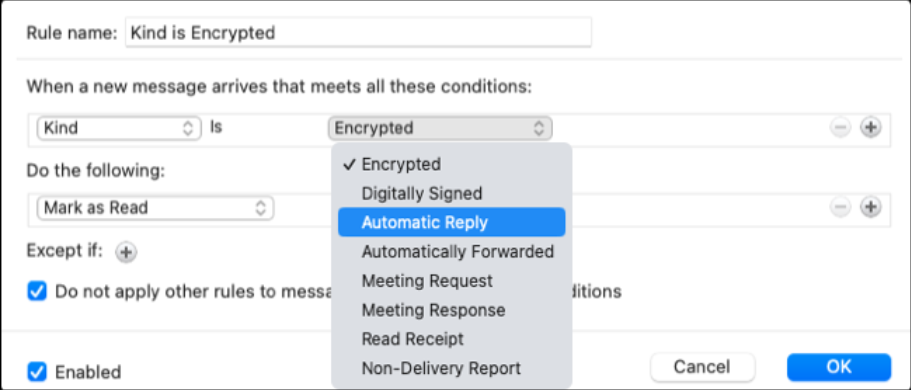
Under Do the Following, select the action like mark the priority or as read. Make sure the Enabled box is checked and click “OK” to apply the rule.

3. Play a Unique Sound for Important Emails
We all know that some emails are more important than others. If you want to make sure you know when a message from that VIP arrives, you can play a specific sound.
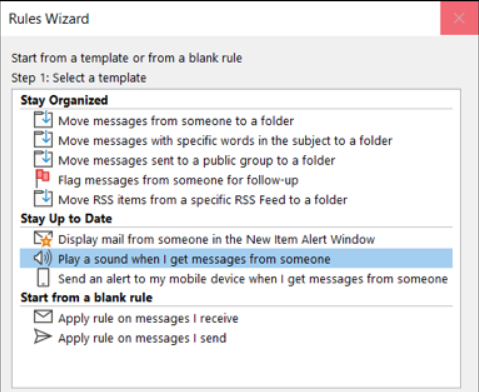
On Windows, you can get a unique alert rule by selecting “Play a Sound When I Get Messages From Someone” in the Stay Up To Date area.
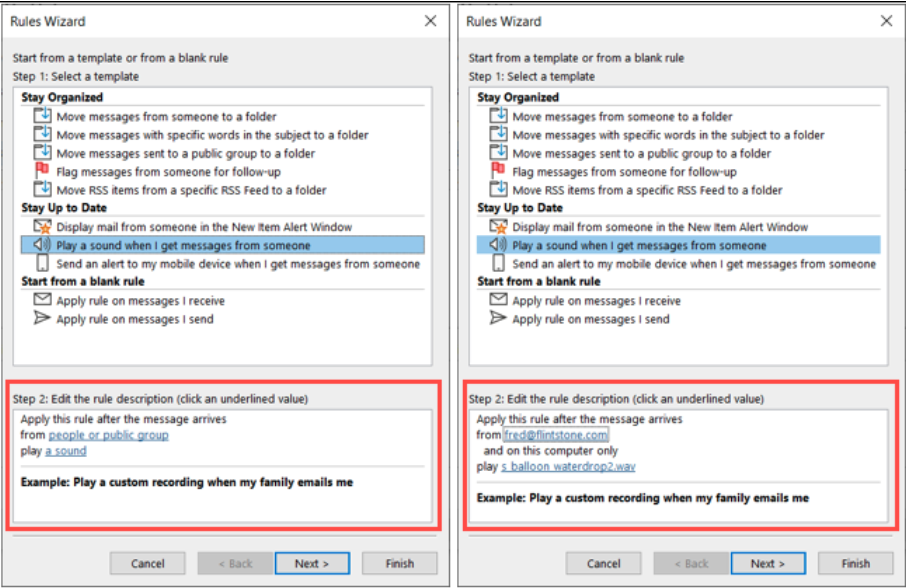
In the Step 2 box, click “People or Public Group”. Select the contact and click “From” at the bottom to add them. Do the same for any additional contacts you want the same sound for, and pick “OK” when you finish.
Click “Sound” in the Step 2 box, locate the sound on your computer, and pick “Open.”
If you want to add exceptions, select “Next” to add them and complete the process. Otherwise, simply click “Finish.”
On Mac, this feature currently only works for accounts in the Client Rules list on the left, not Server Rules. Make your selection and click the plus sign on the right.
Select “From” in the first drop-down list, pick an option in the next drop-down, and finish by adding the contact on the right.
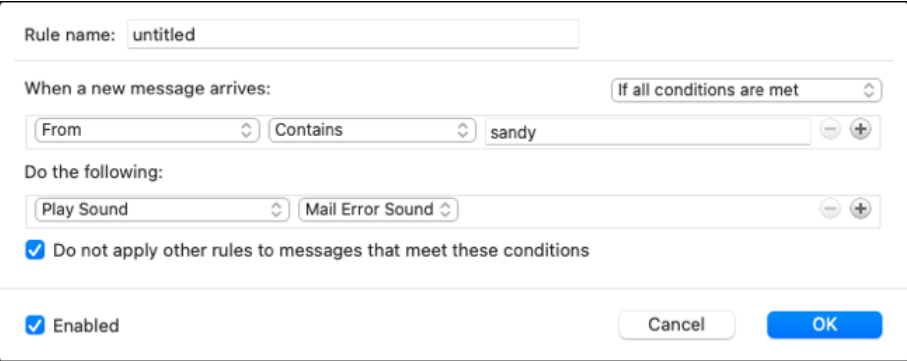
Under Do the Following, pick “Play Sound” and choose the sound in the subsequent drop-down box.
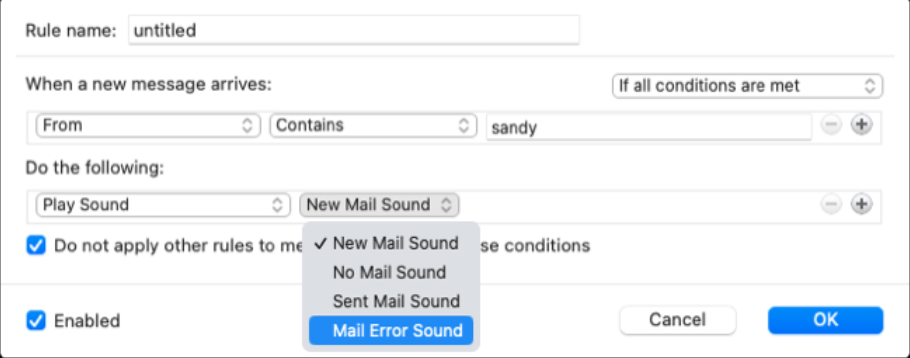
Check the box for Enabled, optionally check the box for not applying other rules, and click “OK.”
4. Display a Custom Alert Message
If you like the idea of seeing a unique message for certain emails instead of hearing a specific sound, you can set up a rule for this instead. Then, just pick the text you want to display in the alert window.
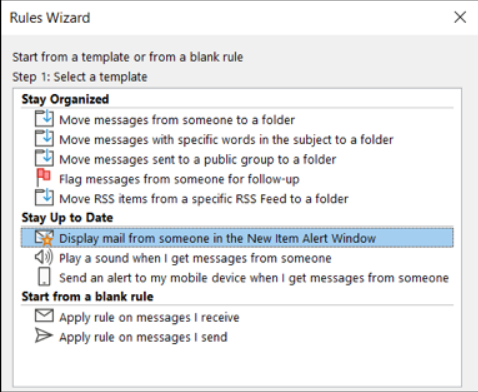
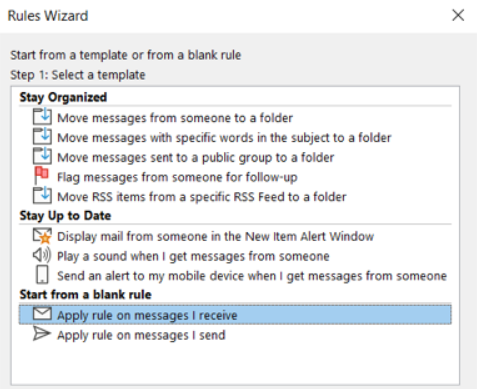
To create a custom alert message in Outlook on Windows, select “Display Mail From Someone in the New Item Alert Window” in the Stay Up To Date area.
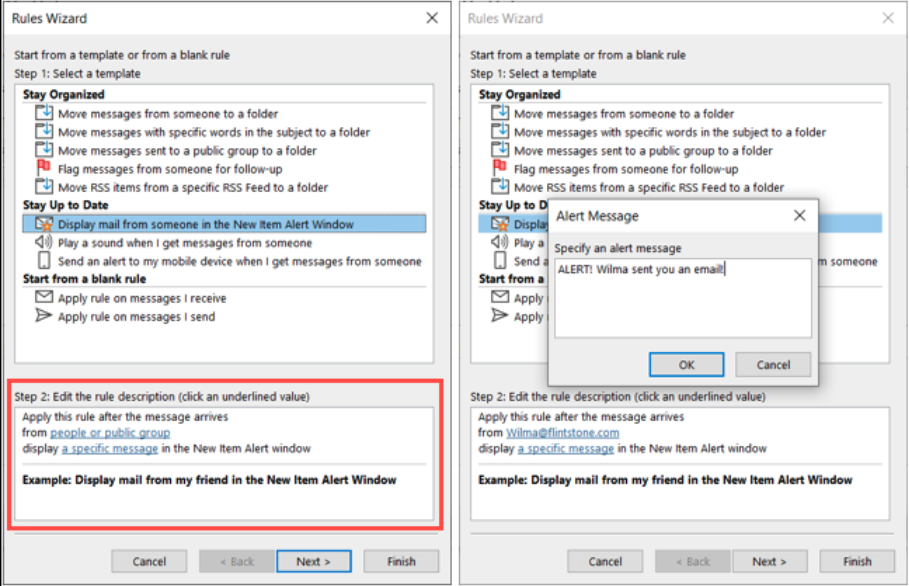
Click “People or Public Group” in the Step 2 box. Select the contact and click “From” at the bottom to add them. Add any other contacts you want the same alert for and pick “OK” when you finish.
Click “A Specific Message” in the Step 2 box, add the text in the box that appears, and pick “OK.”
If you want to add exceptions, select “Next” to add them and complete the process. Otherwise, simply click “Finish.”
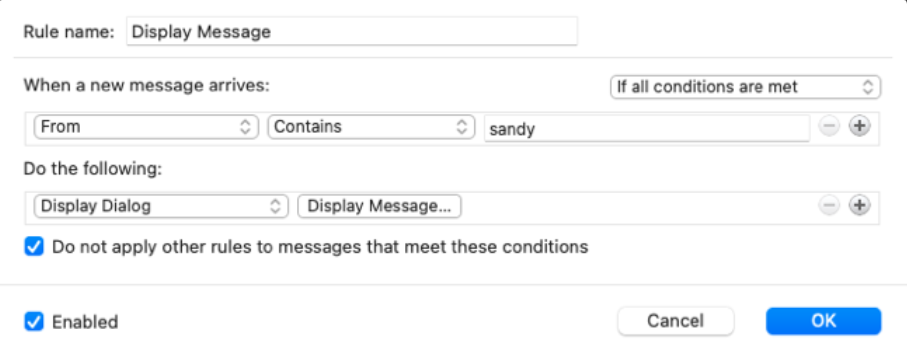
On Outlook for Mac, like the play a sound feature, custom alert messages currently work for accounts in the Client Rules list. Make your selection and click the plus sign on the right.
Select “From” in the first drop-down list, pick an option in the next drop-down, and finish by adding the contact on the right.
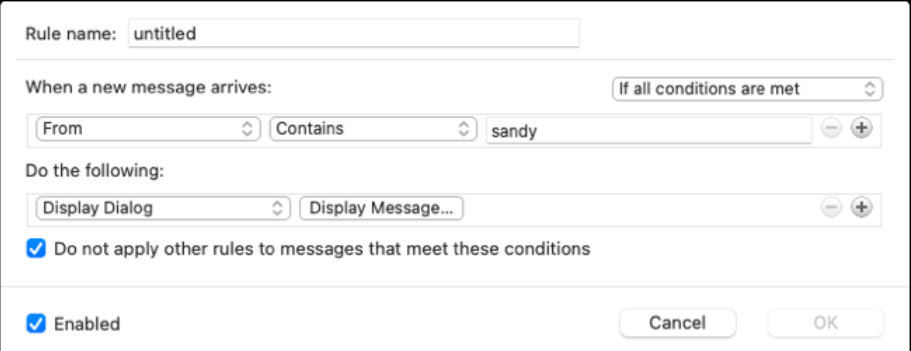
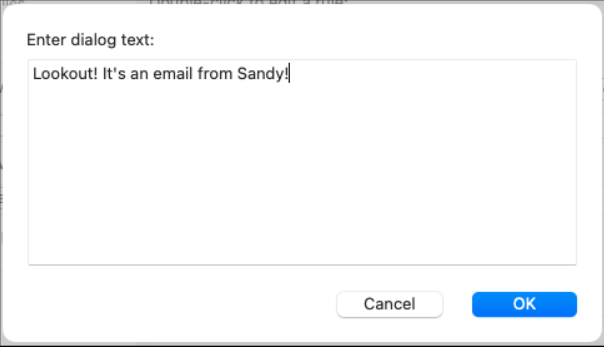
Under Do the Following, pick “Display Dialog” and click Display Message. Type the message and click “OK.”
Check the box for Enabled, optionally check the box to not apply other rules, and click “OK.”
5. Auto Reply With a Template
On the opposite side of receiving automatic replies, maybe you want to send your own. You can set up a template in Outlook and then automatically reply to particular messages you receive with it.
Note: At the time of writing, this rule is only available in Outlook on Windows.
To set up a reply template, Select “Apply Rule on Messages I Receive” in the blank rule area and click “Next.”
Check the box for the condition you want to use. You can choose more than one. This can be specific words in the subject or through a certain email account. After you mark the condition, use the link in the Step 2 box to choose the variable if applicable. Click “Next.”
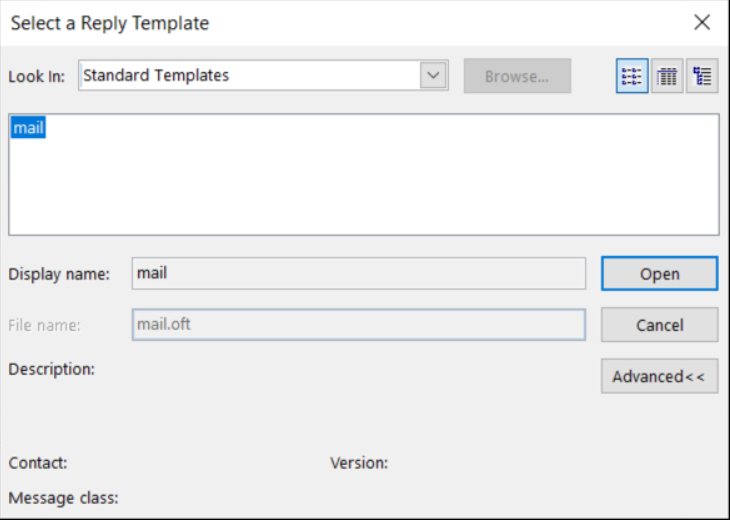
Mark the option for Reply Using a Specific Template. Then, click “A Specific Template” in the Step 2 box.

Use the drop-down at the top to choose the template location. Select the template and pick “Open.”
Click “Next,” add any exceptions you want, and click “Next” again. Complete the remainder of the rule and select “Finish.”
Trinity Worldwide Technologies is here to help you make technology work for your business. Trinity can implement solutions for you to access your company files securely while working from home or on the road. Contact us at (732) 780-8615 or email [email protected] if you would like more information.
Sandy Writtenhouse, “5 Microsoft Outlook Rules You’ll Actually Use”, howtogeek.com, January 5, 2023