
Drop-down lists are one way to simplify data input within Excel, which is helpful where time is money. Here are the steps to easily add drop-down lists in Excel.
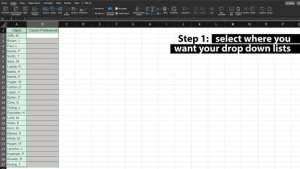
1. Select the cells where the drop-down lists are needed
This example spreadsheet has a list of clients on the left and a column with their corresponding Communication Preference on the right. We’ll add drop-down lists for the Comm Preference column on the right to select whether they want to be emailed, called, or texted. Select the cells to add to drop down list.
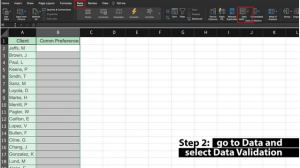
2. Select Data Validation
Go to Data and select Data Validation. A Data Validation popup will appear after you click on Data Validation.
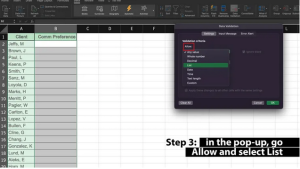
3. Select List
In the Data Validation popup, go to the drop-down menu under Allow and select List.
4. Enter the values for your drop-down list
In the Source field on the popup window, enter the items you want to be able to choose from in your drop-down list, each one separated only by a comma. Enter data for the drop down list.
For this example, I added “Call,Email,Text,NS”.

5. Click “OK” to save your drop-down lists
When you click OK, your drop-down lists will be saved to your Excel spreadsheet and be ready to use right away.
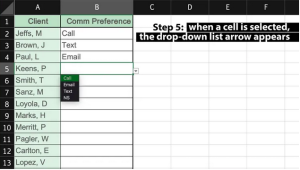
Now, whenever a cell is clicked on, a drop-down arrow will appear on the lower-right corner. Click on the arrow and the drop-down list appears to select from the options. When you select an item from the list, it will populate the cell.
How do I create a yes/no drop-down in Excel?
Creating a yes/no drop-down in Excel uses the process we followed for the example above. All you need to do is follow these steps:
- Select the cells you want to contain the drop-down lists.
- Click on Data Validation.
- Insert Yes,No in the Source field on the pop-up, only separated by a comma.
- Click OK to save your yes/no drop-down list.
Maria Dia, “How to create a drop-down list in Excel — quickly and easily”, zdnet.com, March 20, 2023