 When using Microsoft Excel, you can add a header or footer to your spreadsheets when you want the printout to include the company’s logo at the top of the page, or when you need to add the page number at the bottom to keep everything organized.
You can add a header and footer in at least two different ways through the Insert or Page Layout tab in Excel.
From the Insert tab
To insert a header and footer to an Excel sheet, use these steps:
- Open Microsoft Excel.
- Click the Blank document option in the “Home” section. (Or open the document you want to customize.)
- Click the Insert tab.
- In the “Text” settings, click the Header & Footer option.
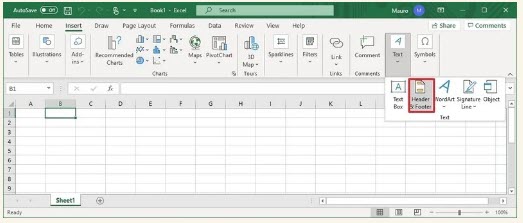
5. Click the left, middle, or right cells at the top to edit the custom header.
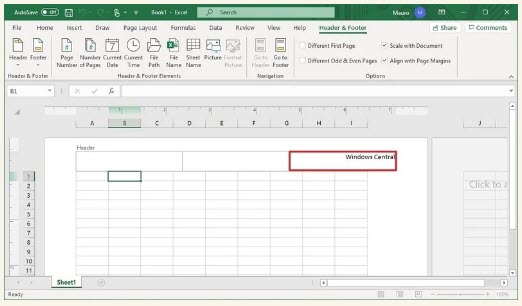
6. Click the left, middle, or right cells at the bottom to edit the custom footer.
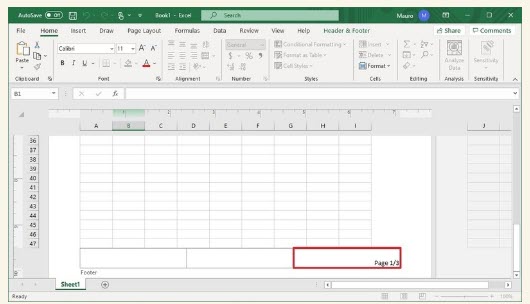
7. (Optional) Use the “Header & Footer Elements” settings to insert predefined elements, including:
-
- Page Number.
- Number of Pages.
- Current Date.
- Current Time.
- File Path.
- File Name.
- Sheet Name.
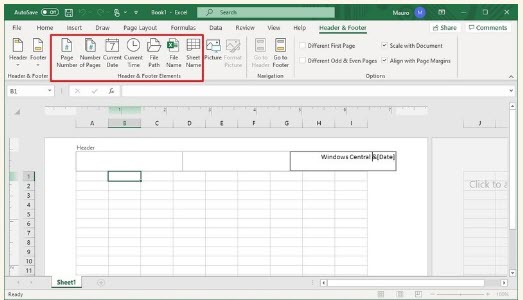
Quick tip: If you don’t see the settings, select the header or footer on the page to bring up the tab.
Once you complete the steps, the spreadsheet now will include a proper header and footer.
If you need to add a piece of text that includes an ampersand (&), then you will need to use two ampersands (&&). If you need to exit the header or footer without applying changes, press Esc. You can click anywhere in the document to exist and apply the changes.
Use image for header or footer in Excel
To use an image for the header or footer, use these steps:
- Open Microsoft Excel.
- Click the Blank document option in the “Home” section. (Or open the document you want to customize.)
- Click the Insert tab.
- In the “Text” settings, click the Header & Footer option.
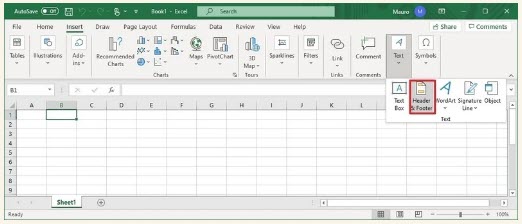
5. Click the Header & Footer tab.
6. Click the sheet header or footer.
7. In the “Header & Footer Elements” section, click the Picture button.
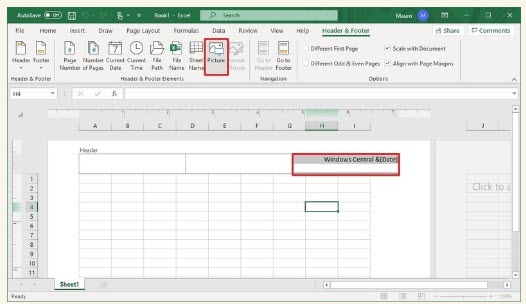
8. Select the source to insert the image from, including:
-
- From a file.
- Bing Image Search.
- OneDrive.
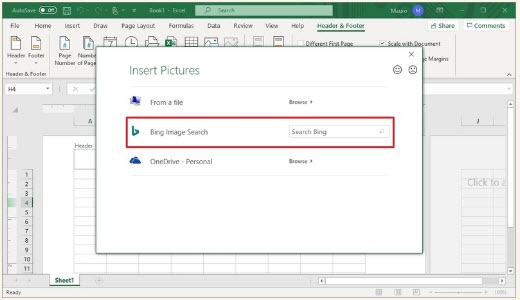
Quick note: If you want to use an image from Bing, use the text box to search for a picture.
9. Select and insert the image.
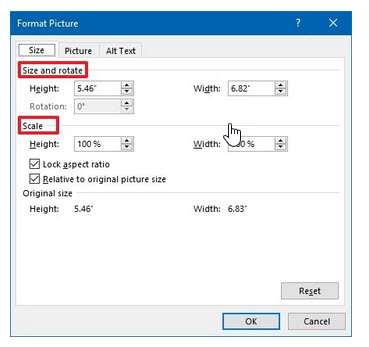
10. (Optional) Click the Format Picture button if you need to adjust the size, rotation, or scale.
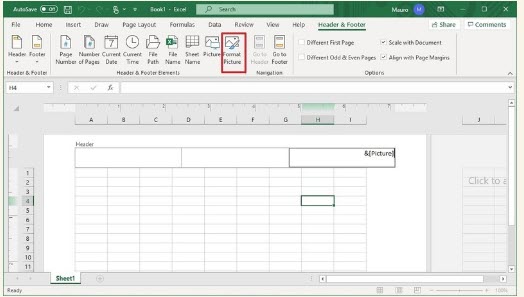
Quick tip: Click the header to make the tools available and then click the Format Picture button.
11. Change the image settings as needed.
12. Click the OK button.
After you complete the steps, the logo or the image you selected will be reflected in the document.
From the Page Layout tab
To add a header and footer with the Page Layout tab, use these steps:
- Open Microsoft Excel.
- Open the document you want to customize.
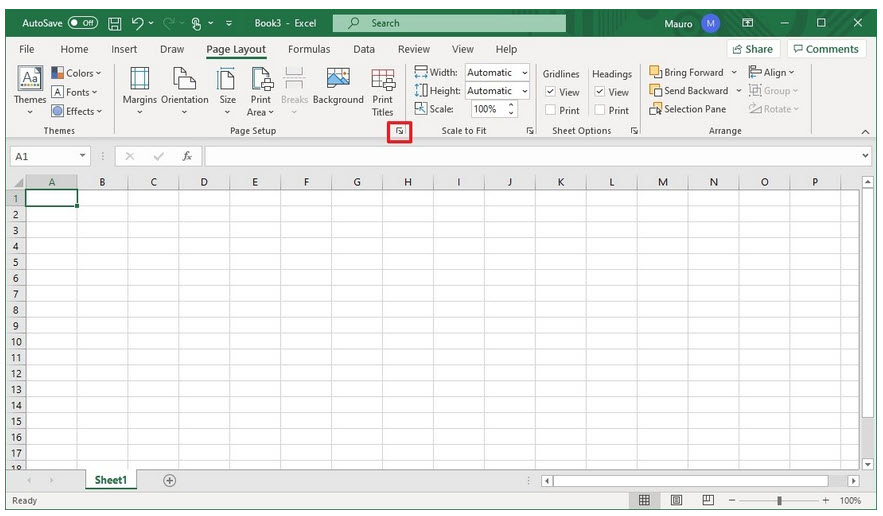
- Click the Page Layout tab.
- In the “Page Setup” settings, click the Dialog Box Launcher button on the right side.
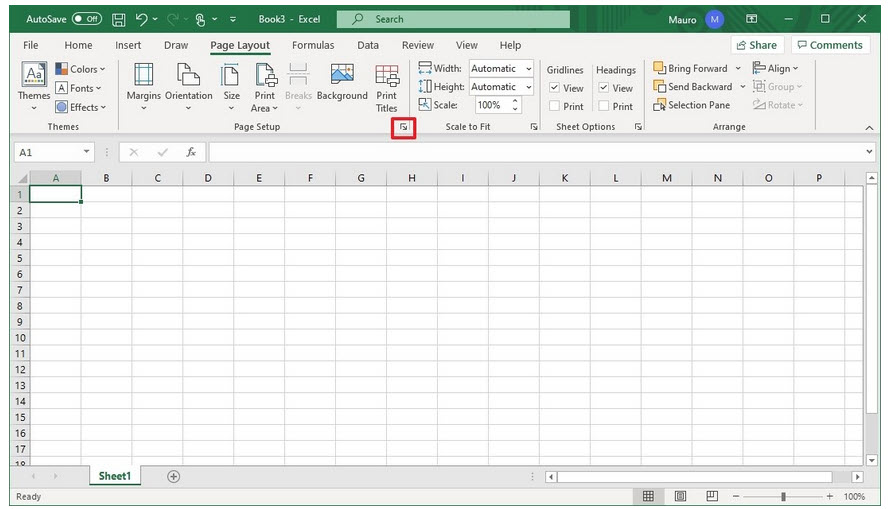
5. Click the Header/Footer tab.
6. (Optional) Use the Header drop-down menu to select one of the available options to use a predefined header.
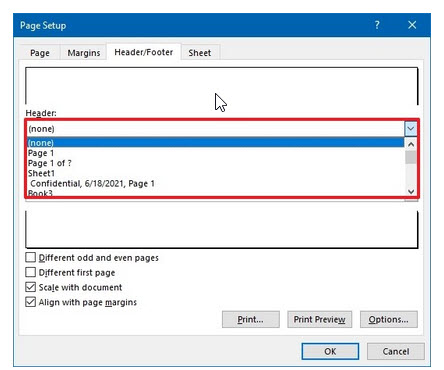
7. (Optional) Use the Footer drop-down menu to select one of the available options to use a predefined footer.
8. Click the Custom Header button.
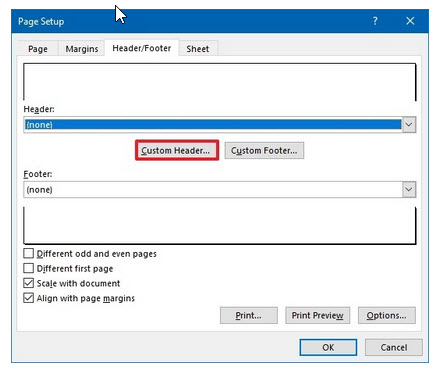
9. Click the Custom Footer button.
10. Select one of the sections (left, center, or right) to show the header or footer.
11. Compose a line of text for the header or footer.
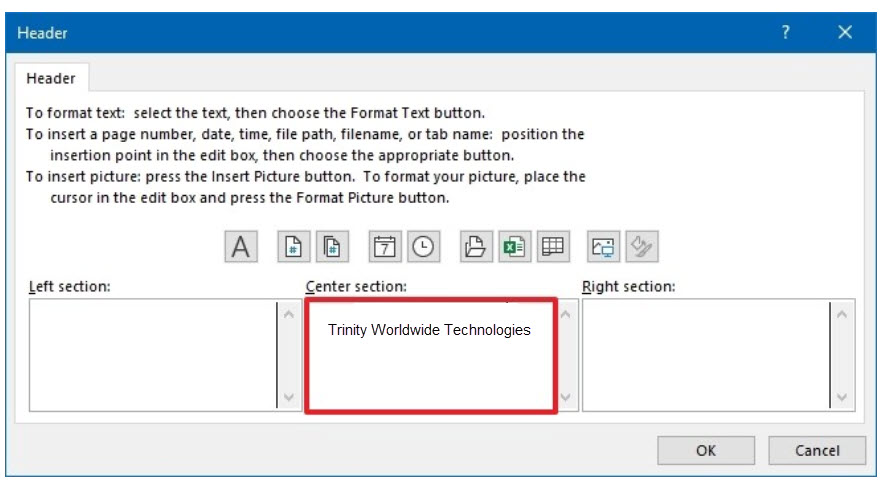
12. Select the text and click the Format Text (A) button to style the header text.
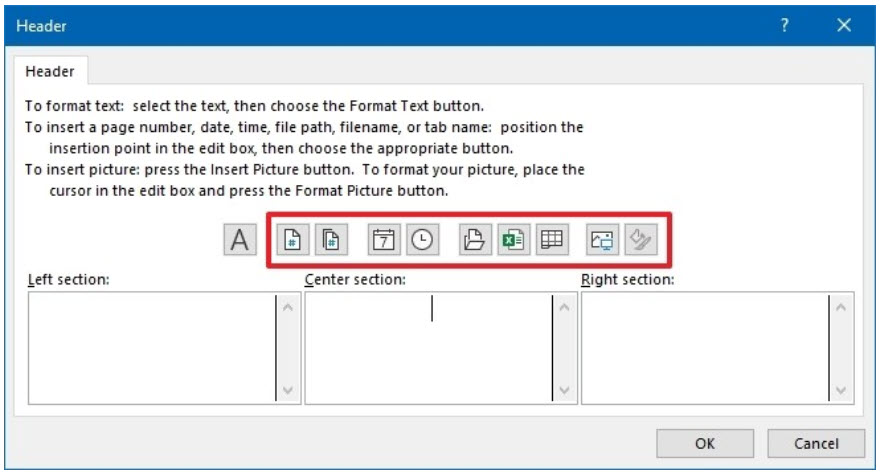
13. (Optional) Click one of the available buttons to insert a predefined header, including:
-
- Insert Page Number.
- Insert Number of Pages.
- Insert Date.
- Insert Time.
- Insert File Path.
- Insert File Name.
- Insert Sheet Name.
- Insert Picture.
14. Click the OK button.
15. Click the OK button again.
Once you complete the steps, the header and footer will be applied to the sheet you are editing. If you do not see the changes, click the View tab, and then in the “Workbook Views” settings, click the Page Layout button.
Use image for header or footer in Excel
To use the Page Layout tab to add an image for the header or footer, use these steps:
- Open Microsoft Excel.
- Open the document you want to customize.
- Click the Page Layout tab.
- In the Page Setup settings, click the Dialog Box Launcher button on the right side.
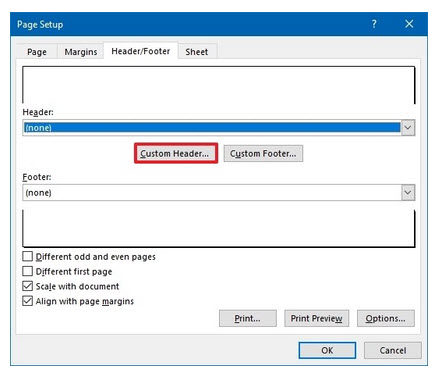
5. Click the Header/Footer tab.
6. Click the Custom Header button.
7. Click the Custom Footer button.
8. Select one of the sections (left, center, or right) to show the header or footer.
9. Click the Insert Picture button on the left side.
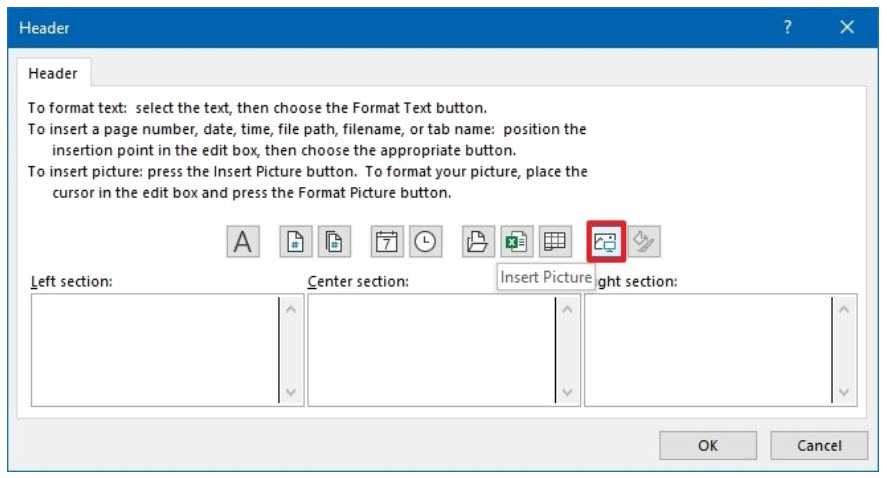
10. Select the source to insert the image from, including:
-
- From a file.
- Bing Image Search.
- OneDrive.
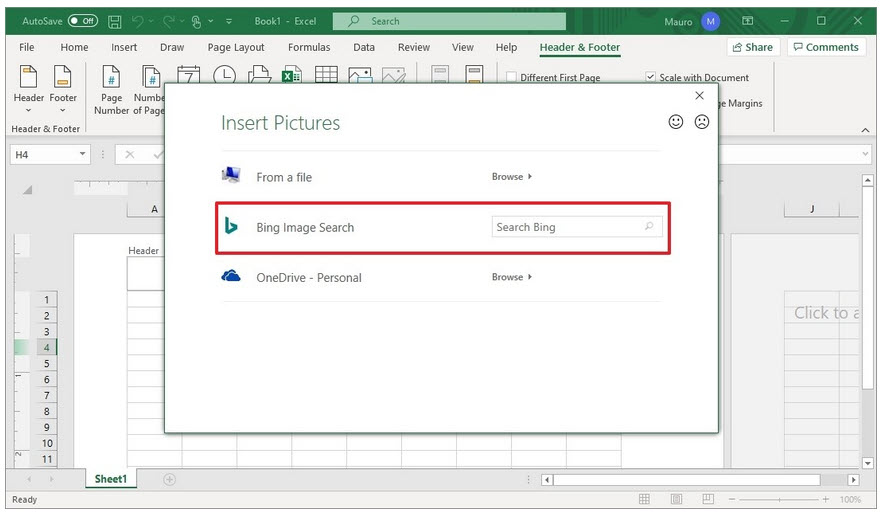
Quick note: If you want to use an image from Bing, use the text box to search for a picture.
11. Select and insert the image.
12. (Optional) Click the Format Picture button from the left side if you need to adjust the size, rotation, or scale.
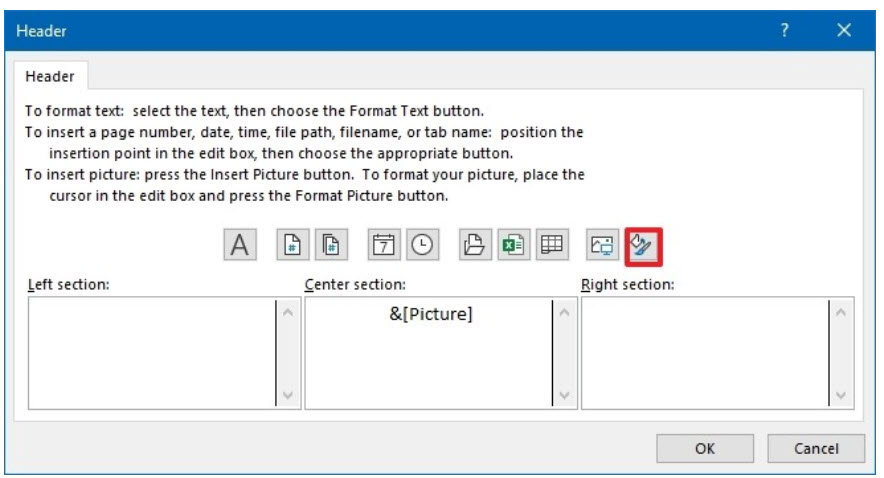
13. Change the image settings as needed.
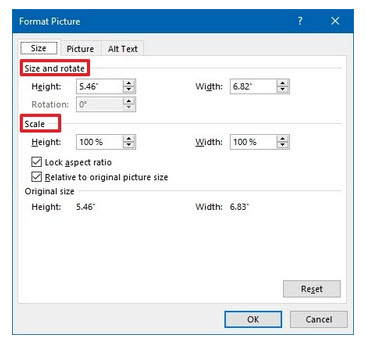
14. Click the OK button.
After you complete the steps, the image will appear in the location you specified.
While the ability to use a header and footer has been available for a long time, if you are still using an older version of Office, you should consider upgrading to Office from Microsoft 365.
Mauro Huculak. “How to add a header and footer in Excel” Windowscentral.com June 23, 2021
