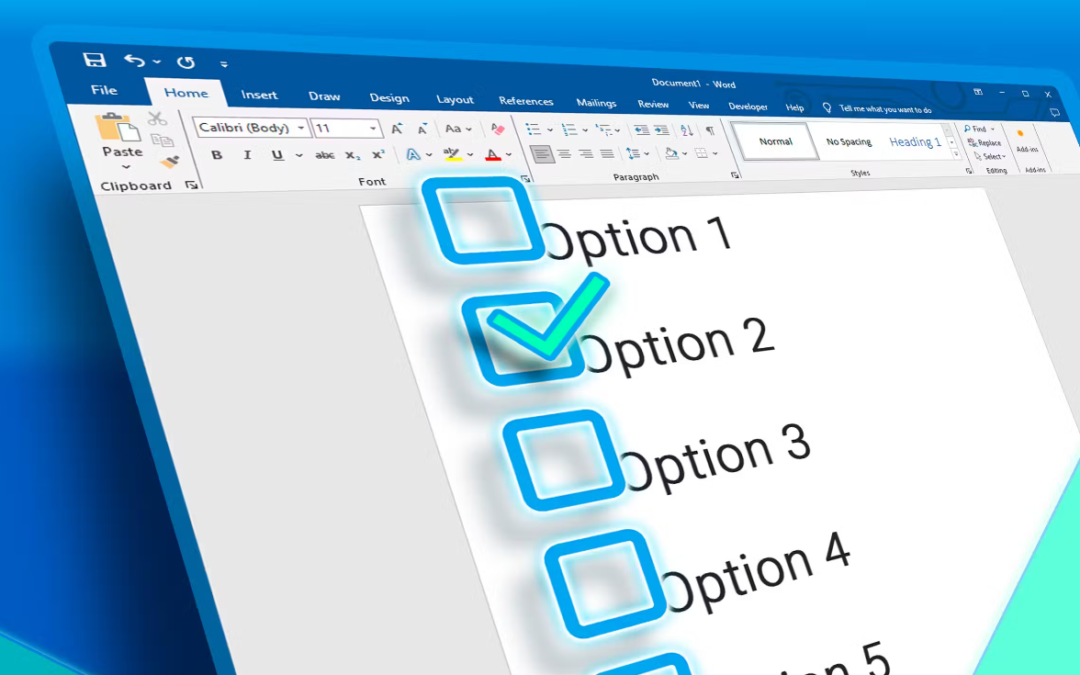
When you create surveys or forms with Microsoft Word, checkboxes make the options easier to read and answer. We’re covering two good options for doing just that. The first is ideal for documents that you want people to fill out digitally within the Word document itself. The second option is easier if you’re planning to print documents like to-do lists.
Option 1: Use Word’s Developer Tools to Add the Checkbox Option for Forms
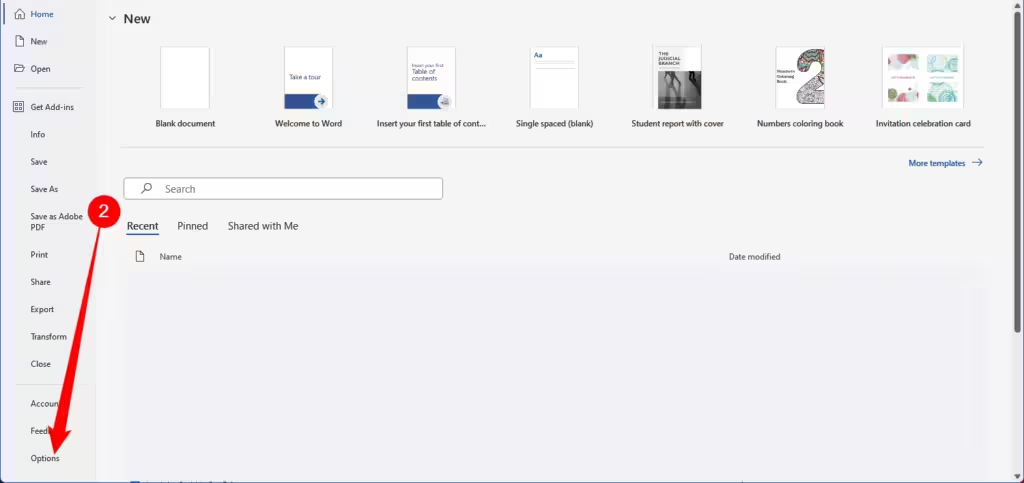
In order to create fillable forms that include checkboxes, you first need to enable the Developer tab on the Ribbon. With a Word document open, click the “File” drop-down menu and then choose the “Options” command.

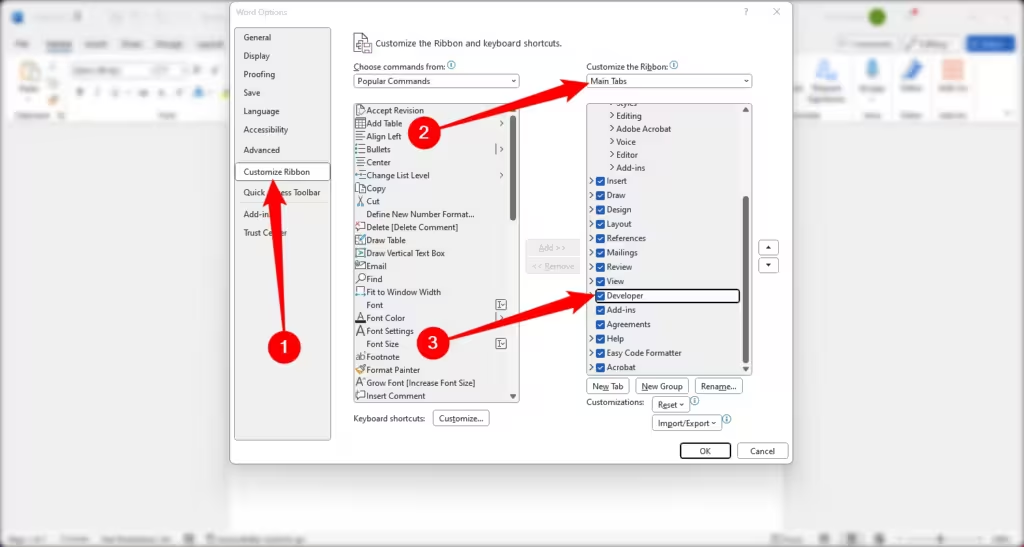
In the Word Options window, click to the “Customize Ribbon” tab. In the right-hand Customize the Ribbon list, select “Main Tabs” on the drop-down menu. On the list of available main tabs, select the “Developer” check box, and then click the “OK” button
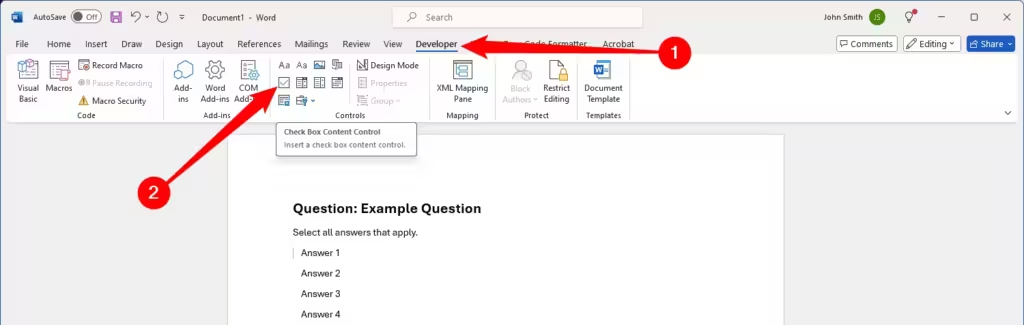
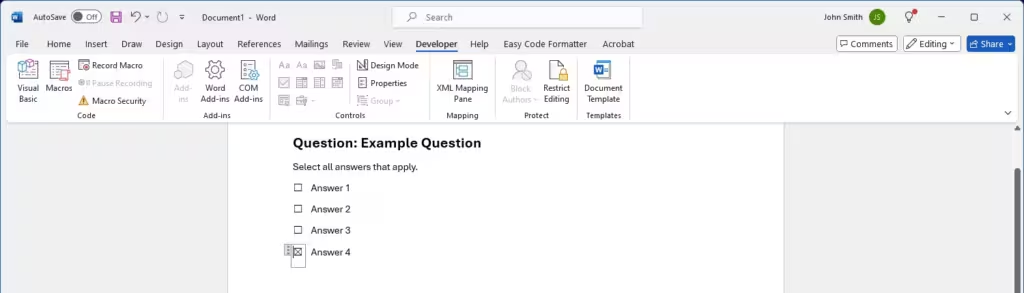
Note that the Developer tab is added to your Ribbon. Just position your cursor in the document where you want a checkbox, switch to the “Developer” tab, and then click the “Check Box Content Control” button.
You should see a checkbox appear wherever you placed your cursor. Here, we’ve gone ahead and placed a checkbox next to each answer and, as you can see, those checkboxes are interactive. Click a box to mark it with an X or select the whole form box to move the checkbox around, format it, and so on.
Option 2: Change Bullets to CheckBoxes for Printed Documents
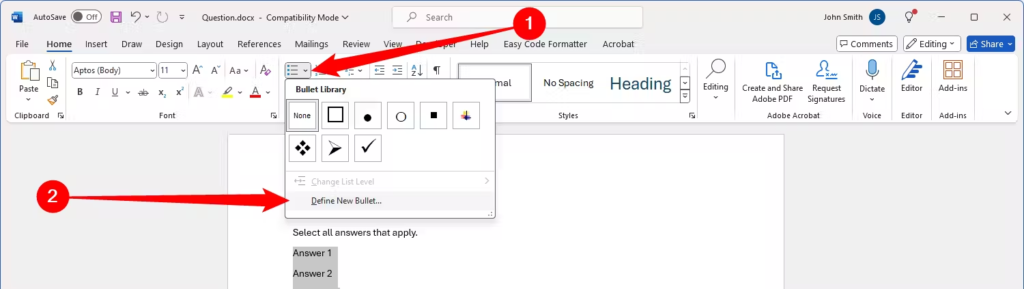
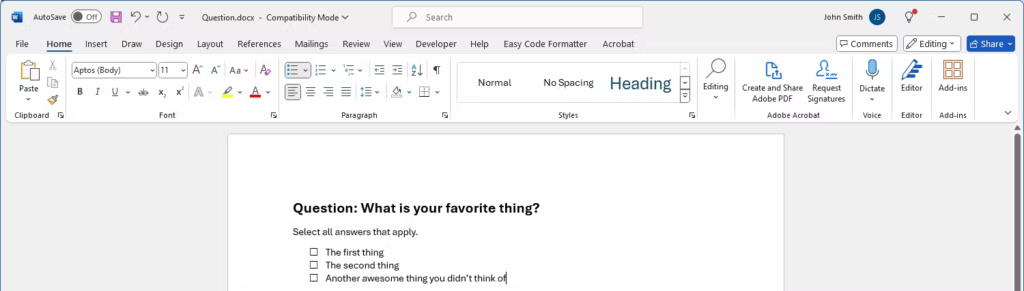
If you’re creating a document to print out—like a to-do list or printed survey—and just want checkboxes on it, you don’t have to mess around with adding Ribbon tabs and using forms. Instead, you can create a simple bullet list and then change the bullets from the default symbol to checkboxes.
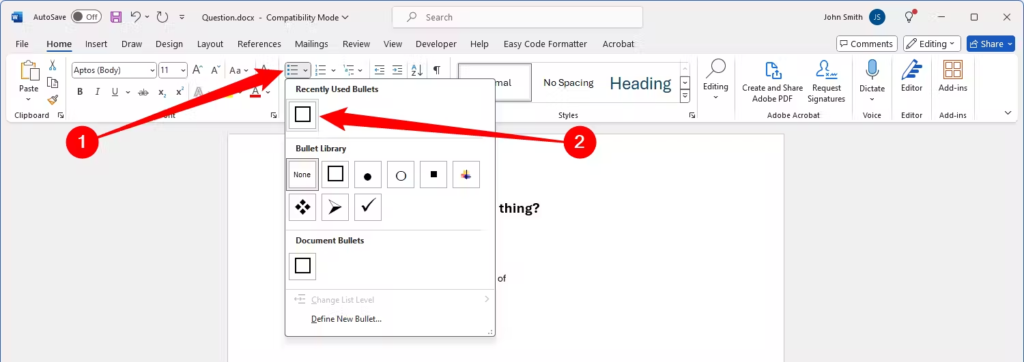
In your Word document, on the “Home” tab, click the small arrow to the right of the Bullet List button. On the drop-down menu, select the “Define New Bullet” option if you don’t already see a box.
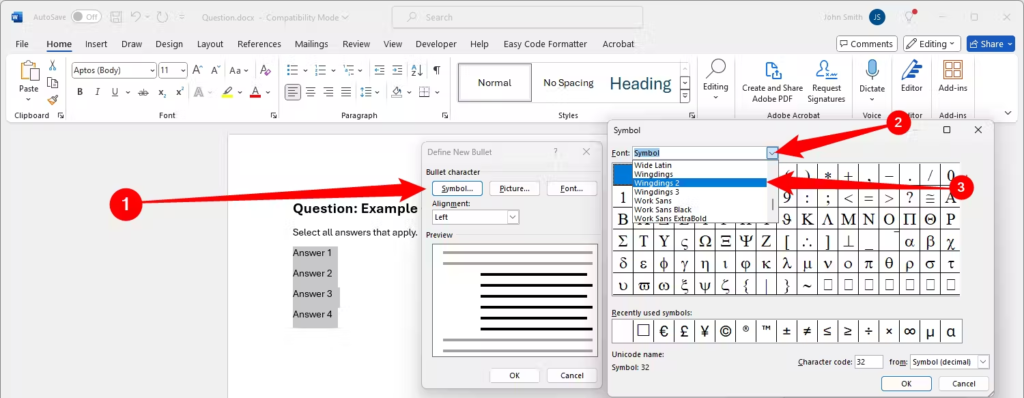
In the Define New Bullet window, click the “Symbol” button. In the Symbol window, click the “Font” drop-down list and choose “Wingdings 2.” .
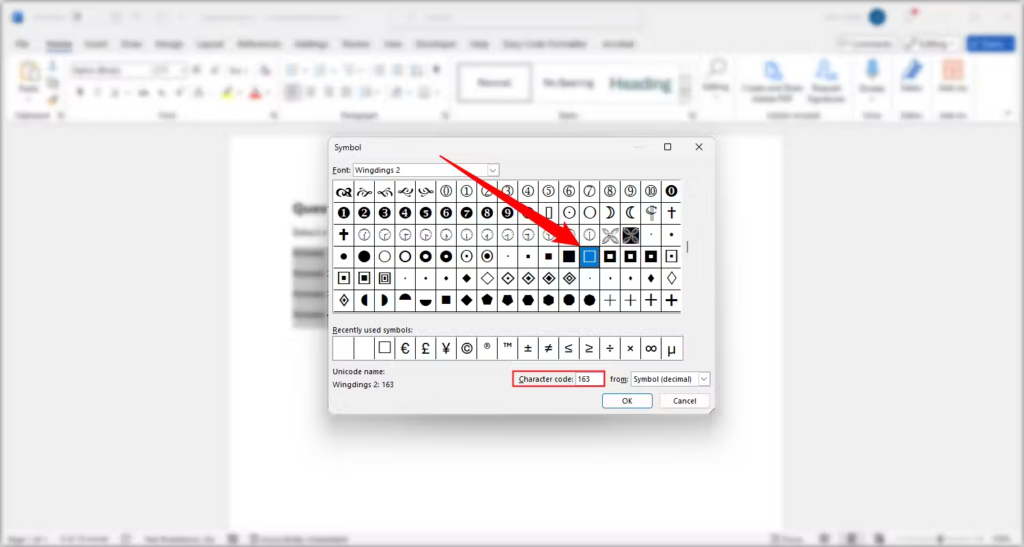
You can scroll through the symbols to find the empty square symbol that looks like a checkbox, or you just type the number 163 into the Character Code box to automatically select it. Of course, if you see a symbol you like better—like the open circle (symbol 153)—feel free to choose that instead.
When you’ve selected your symbol, click the “OK” button to close the Symbol window, and then click the “OK” button to close the Define New Bullet window, too.
Back in your Word document, you can now type your bullet list. The checkboxes appear instead of the regular bullet symbol
And the next time you need the checkbox symbol, you don’t have to navigate through that whole set of windows. Just click that small arrow to the right of the Bullet List button again, and you’ll see the checkbox listed under the Recently Used Bullets section.
Again, this method is really only useful for documents you want to print out. The checkbox symbols are not interactive, so you can’t check them off inside a Word document.
We hope these tips have been helpful in your business. Please let us know if you have any questions about your IT environment or how to secure it from outside cyber threats. We are here for you! Contact us at (732) 780-8615 or email at [email protected].
Martin Hendrikx and Nick Lewis, “How to Add Checkboxes to Word Documents“, howtogeek.com, June 5th, 2024