 Adjusting dates on a spreadsheet can be cumbersome. Rather than digging out your calendar to count days or months, you can adjust dates right in Microsoft Excel with simple addition or subtraction.
Whether it’s a project schedule with deadlines, a budget with due dates for bills, or an inventory sheet with shipping dates, adjusting those dates doesn’t have to be a pain. In a few simple steps, you can enter the addition or subtraction and calculate your new dates automatically.
Set Up Your Microsoft Excel Spreadsheet
You’ll need three columns in your sheet to accommodate the date adjustments.
A column with the original dates (deadlines, due dates).
A column to enter the number of days that you want to add or subtract.
A column for the new dates.
Depending on which data you already have in your sheet, the first step is to make sure that you have these columns. Also, make sure that the date columns are formatted for dates in whichever style you prefer.
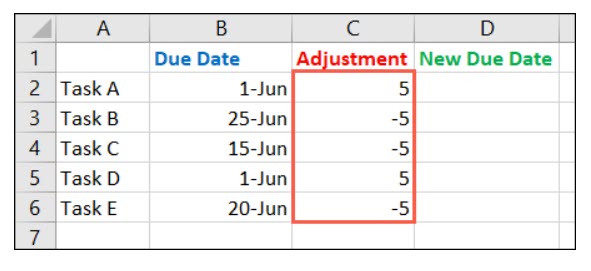
For this example, we’re using due dates, and we have the columns set up in the order described above: Due Date, Adjustment, and New Due Date.

How to Add or Subtract Days from Dates in Excel
Assuming that you have the original dates to work with, enter the number of days that you want to add or subtract from the dates in that adjustment column. Enter a positive number to add to the date or a negative number to subtract from it.
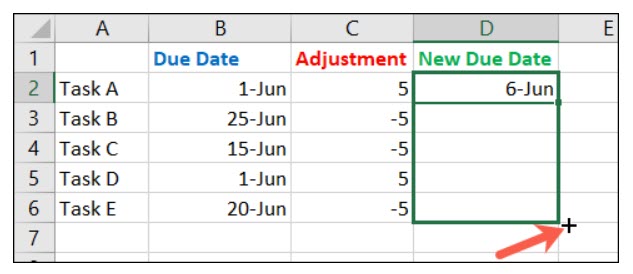
Next, go to the first cell in the column for your new dates and enter a sum formula to add the number of days to the original date. Depending on the columns and rows that you have in your sheet, the cell references might differ.
For our sheet, we’ll enter:

Hit Enter or Return to apply the formula. You can then check to make sure that the formula calculated correctly.
To save manual work, you can use the fill handle to drag the cell containing the formula to the remaining cells in your column. Excel will automatically adjust the formulas to the corresponding cell references.
Now that you have the formulas in your new date column, you can change the number of days in the adjustment column whenever you need to.

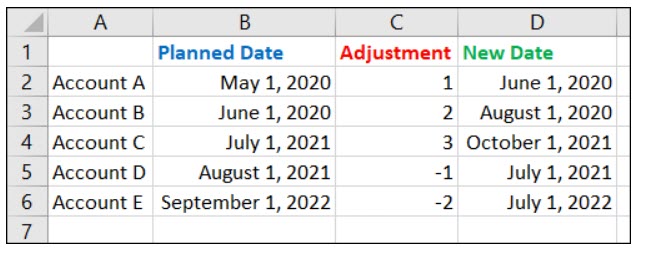
How to Add or Subtract Months from Dates in Excel
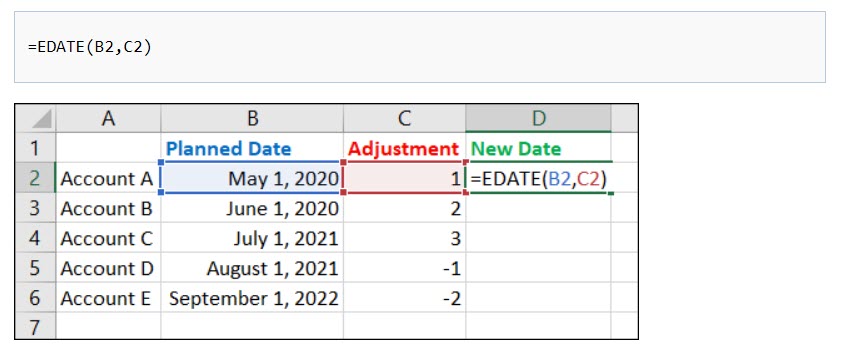
You might have a spreadsheet where you need to add or subtract months rather than days. Maybe it’s a savings, loan, or investment sheet. The setup is similar, but you’ll use the EDATE function to help calculate the adjustment.
So, be sure that you have your three columns for the original dates, number of month adjustments, and new dates, and be ready to confirm that the date columns are formatted as such.
Enter the number of months that you want to add as positive and subtract as negative in the correct column.

Go to the first cell in the column for your new dates and enter the function to add the original date to the number of months. Once more, your particular cell references might differ.
For our sheet, we’ll enter:
Hit Enter or Return to apply the function and confirm that it calculates correctly. Again, you can use the fill handle to drag the function to the remaining cells.
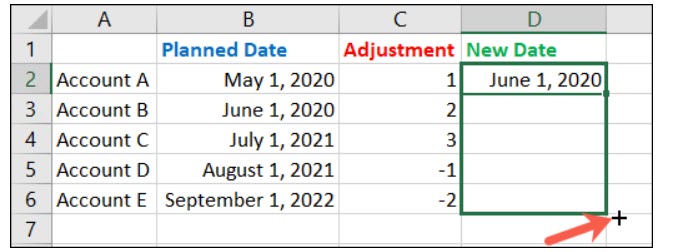
And as with adding or subtracting days, you can change the number of months that you want to adjust in that column, and the function will provide you with your new dates.
Bonus: If you want to add or subtract years instead of months, set up your sheet, columns, and formatting the same as described above. Then, use the following DATE function in the new dates column with your correct cell references.

Writtenhouse, Sandy. “How to Add or Subtract Date in Microsoft Excel” How to Geek June 30, 2021