You wouldn’t like someone snooping around your Gmail account, would you? I can’t blame you. Lock it down right now.
From bank statements to personal letters, and even password reset requests, your Gmail account holds an abundance of personal information. If someone were to access it, they’d effectively have access to the rest of your online identity.
Instead of just hoping that hackers don’t find you, take 10 minutes and secure your Gmail account right now.
Use a strong password
I suspect we’re all guilty of reusing simple passwords at some point — I admit that I used to. But reusing passwords across multiple sites and services is just asking for your accounts to be hacked. All it takes is a leak or breach at one service, and hackers will begin trying to sign in to all of your accounts.
It’s time to step up your password game. Use unique, randomly generated passwords, for every online account you have. Keeping track of all those passwords is easy when you use a password manager. We have a roundup of the best password managers available, both free and paid, if you need help with deciding which one to use.
To change your Google account password, visit the Google account security page and click on Password under the Signing in to Google section. Verify your password if prompted, then enter your new password — generated by your password manager — and click Change password.

Enable two-step verification
Without two-step verification, also commonly called two-factor authentication, hackers only need your password to access your entire Google account — including YouTube, Gmail and Google Pay. And remember, if you reuse the same password for multiple services, they could get it from a data breach or through a phishing scam.
With two-step verification, sometimes called two-factor authentication, hackers would need your password and a randomly generated six-digit passcode or physical access to your phone before they could gain access to your account.
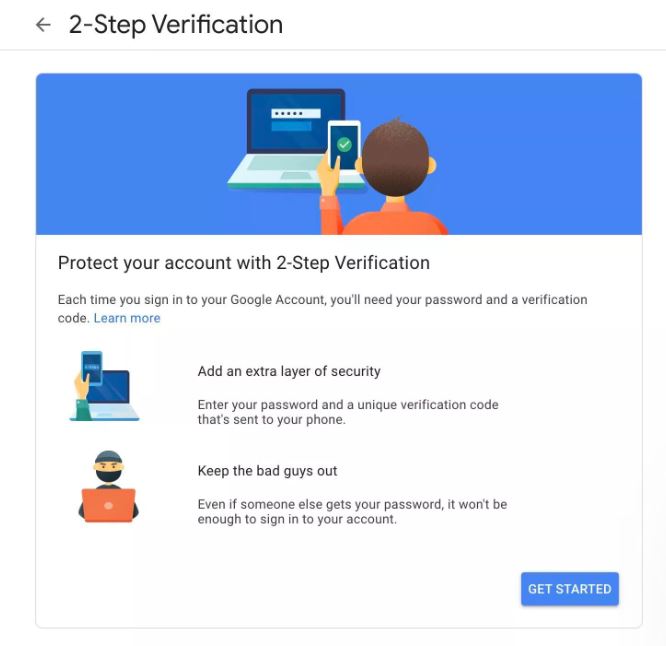
Turn on 2SV by visiting your Google account security page and clicking on 2-Step Verification.

Follow the prompts until you reach the section in the screenshot above. Once there, decide whether you want to receive push alerts in the Gmail app to approve login requests (the default option), or if you want to use random passcodes. Using alerts in the Gmail app is easier, but it means you have to have your phone nearby at all times. You’ll also need a connection to approve the alert. So, if you’re somewhere where you have no bars — like on a plane, for instance — you’ll need to be connected to Wi-Fi.
If you choose to use a passcode, you can receive it via text message or access it in a password manager. I use a password manager to manage my 2SV codes so I can access the codes on any device, regardless of whether I have a data connection on my phone.
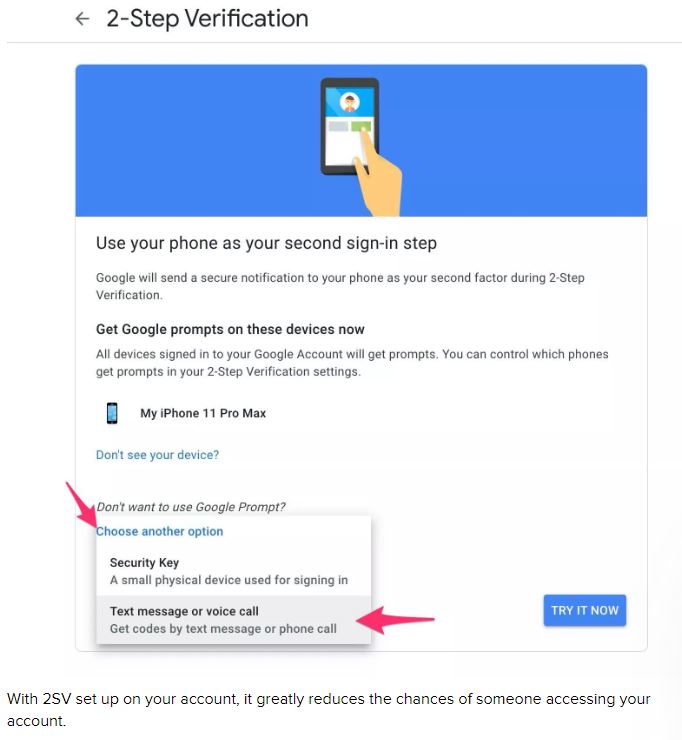
If you opt to use alerts, click Try it now. You should receive an alert on the phone that was listed on the screen. Follow the rest of the prompts to complete setup.
If you want to use passcodes, however, click on Choose another option and then Text message or voice call.
Enter your phone number, and then enter the code to activate two-step verification. After entering the code and clicking a few more buttons, 2SV will be turned on.

But, wait, you’re not done yet. Though 2SV via texted passcodes is more secure than not using 2SV at all, I recommend using push alerts if possible. SIM-swap fraud is becoming more common, allowing hackers to take over your phone number and receive 2SV codes meant for you.
If you must rely on passcodes, take a few extra minutes and set up an Authenticator app for your Google account. You can either use Google’s Authenticator app or a password manager. Click on Set Up under the Authenticator app section and then select the type of phone you use. Use your preferred app to scan the QR code, then enter the passcode generated by your app to verify everything is set up properly and you’re done.
Quick side note: There’s yet another, even more secure option for locking down your Google account that uses a physical security key which you can read more about here. For most people, however, carrying around an extra device isn’t a realistic option. At a minimum, you should turn on 2SV.
Phew. That was a lot of work, but trust me, it’s worth it.

Check your backup contact methods
Since the time that you first set up your Gmail account, you may have changed your phone number, or ditched an old email account. So it’s a good idea to double-check your backup contact methods. This is what Google will use should you get locked out of your account to verify you’re the account owner.
Visit this page and look for the section titled Ways we can verify it’s you.
Click on each section — Recovery phone, Recovery email and Security question — and update them with current information.
Again, if this information is out of date and you get locked out of your account, Google won’t be able to verify you own the account.

Look at account activity
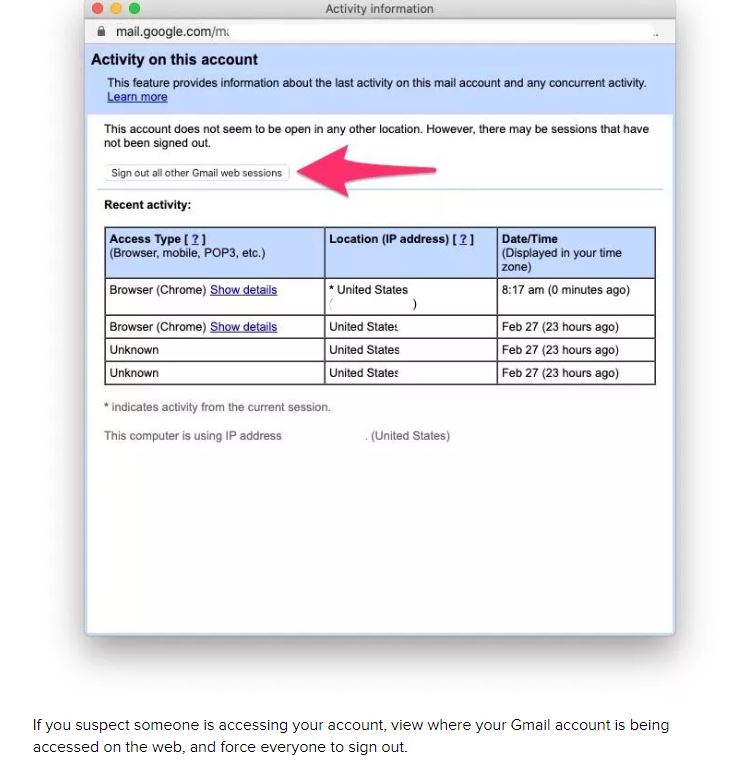
It’s possible that a hacker (or an ex) is accessing your account without your knowledge. To check, sign in to your Gmail account and scroll to the bottom of the page. You’ll see a line that says “Last account activity…”
At the end of that line, click Details to see when, how and where your account is being used. If you suspect any unkosher activity, click on the button labeled Sign out of all other Gmail web sessions and immediately change your password.
Cipriani, Jason. “4 steps you should take to secure your Gmail account right away” cnet.com March 2020
