 In the previous month, we brought you an insightful compilation of 9 Microsoft Word tips that undoubtedly added convenience to your workflow. Now, we’re back to further enhance your Word processing experience with an additional set of 5 lesser-known yet incredibly valuable tricks and time-saving hacks. These gems of knowledge are poised to revolutionize the way you interact with this widely-used word processor, offering you newfound efficiency and mastery over its features.
1. Select Text From the Keyboard
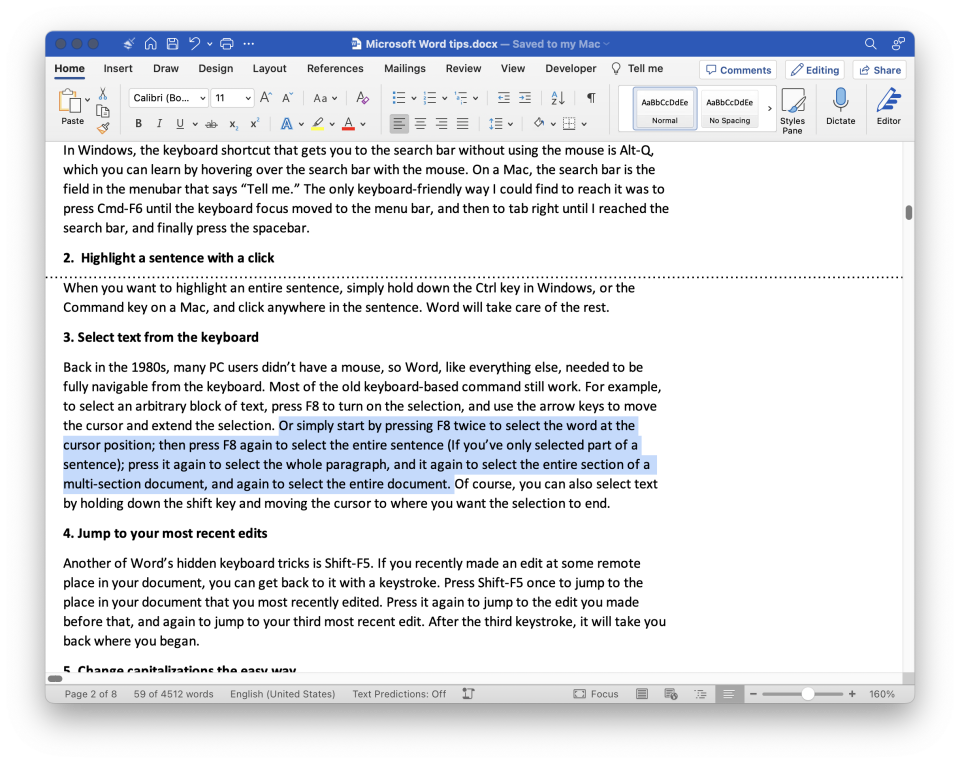
Most of Word’s 80s-era keyboard-based commands still work. For example, to select an arbitrary block of text, press F8 to turn on the selection, and use the arrow keys to move the cursor and extend the selection. Or simply start by pressing F8 twice to select the word at the cursor position, press F8 again to select the entire sentence (If you’ve only selected part of a sentence), press it once more to select the whole paragraph, press it yet again to select the entire section of a multi-section document, and finally press it again to select the entire document. Of course, you can also select text by holding down the shift key and moving the cursor to where you want the selection to end.
2. Insert Spreadsheets and More
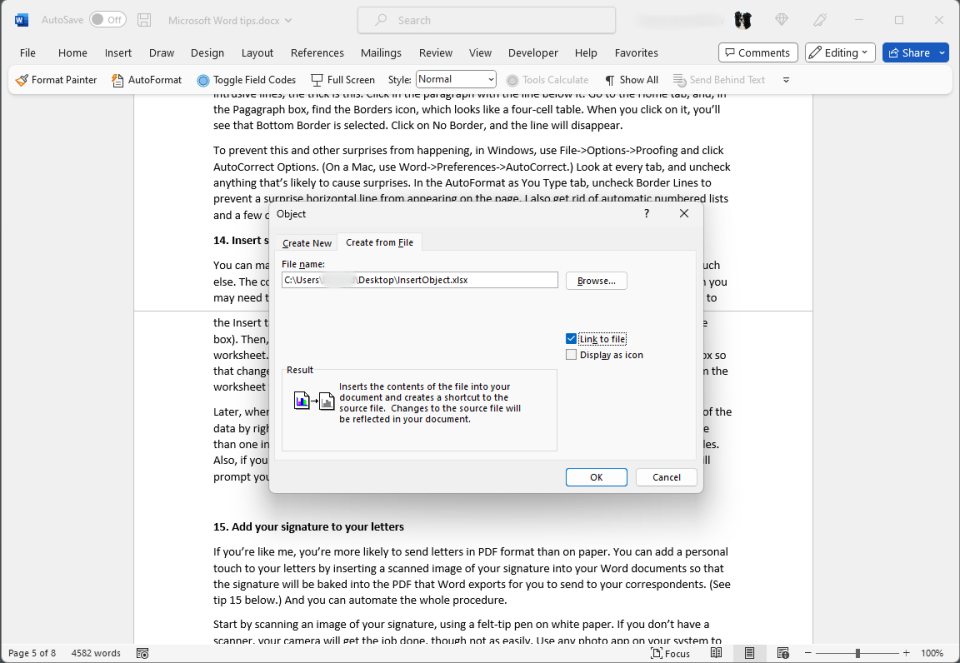 You can make Word display the current contents of an Excel spreadsheet, PowerPoint slide, and much else. The contents displayed in Word will be the current version of the spreadsheet or slide, though you may need to go through a few steps to update Word’s copy of the data. In Windows, start by going to the Insert tab of the Ribbon, then, in the Text box, click Object (it’s the icon at the lower-right of the box). Then, in the dialog that opens, choose, the Create from File tab, and select an existing Excel worksheet. (On a Mac, use Insert > Object, and click the File button.) Click the “Link to File” checkbox so that changes in the Excel file will be reflected in the Word document. Word will insert the cells from the worksheet that have data in them. Word calls the inserted cells an “object.”
Later, when you change the data in the worksheet in Excel, you can make Word update its version of the data by right-clicking in the cells and choosing Update Link from the pop-up menu. If you have more than one inserted object in your document, you update all of them from File > Info > Edit Links to Files. Also, if you close your Word file, and reopen it after changing the content of the Excel file, Word will prompt you to update the data in the Word file.
3. Search For and Replace Hidden Characters
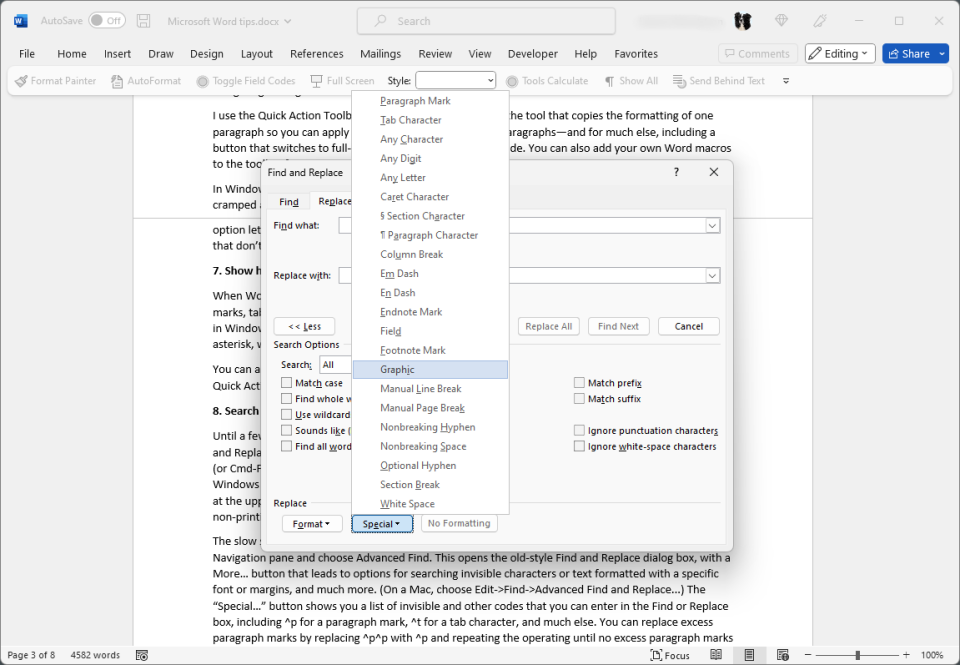 Until a few years ago, when you wanted to search your document, Word opened a full-featured Find and Replace dialog box that floated above the editing window. Now, by default, when you press Ctrl-F (or Cmd-F on a Mac) or you open the Find command from the Editing box in the ribbon, Word for Windows opens a Navigation pane to the left of the document, and Word for the Mac opens search box at the upper right. If you want to search for a paragraph mark or a tab or non-breaking space or other non-printing characters, there’s no obvious way to do it.
The slow solution, in Windows, is to click the drop-down arrow at the right of the search box in the Navigation pane and choose Advanced Find. This opens the old-style Find and Replace dialog box, with a More… button that leads to options for searching invisible characters or text formatted with a specific font or margins, and much more. (On a Mac, choose Edit > Find > Advanced Find and Replace…) The “Special…” button shows you a list of invisible and other codes that you can enter in the Find or Replace box, including ^p for a paragraph mark, ^t for a tab character, and much else. You can replace excess paragraph marks by replacing ^p^p with ^p and repeating the operation until no excess paragraph marks clutter your document.
4. Insert or Create Equations
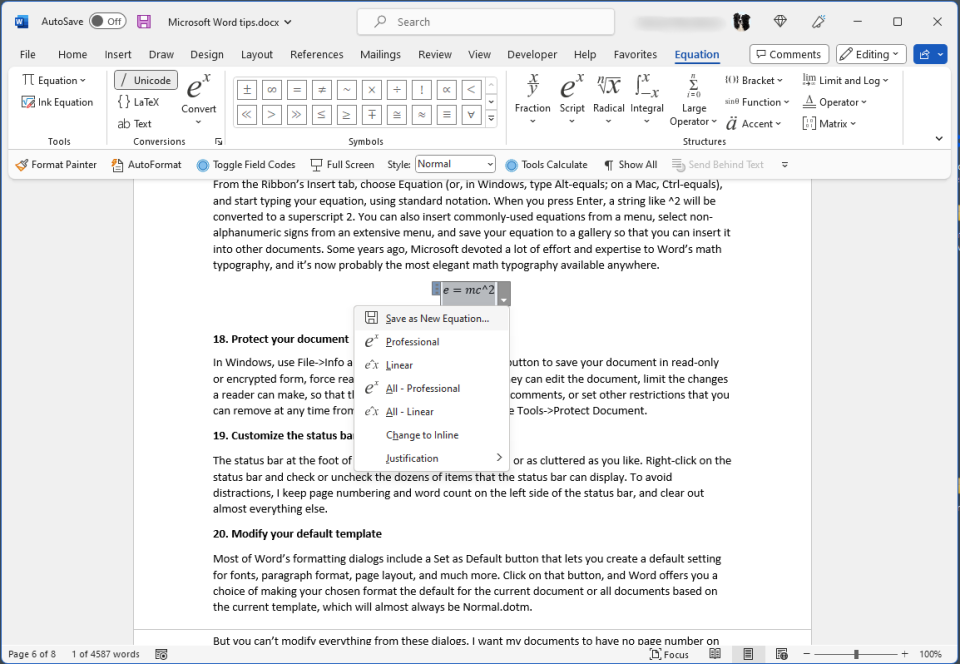 From the Ribbon’s Insert tab, choose Equation (or, in Windows, type Alt-=; on a Mac, Ctrl-=), and start typing your equation, using standard notation. When you press Enter, a string like ^2 will be converted to a superscript 2. You can also insert commonly used equations from a menu, select non-alphanumeric signs from an extensive menu, and save your equation to a gallery so that you can insert it into other documents. Some years ago, Microsoft devoted a lot of effort and expertise to Word’s math typography, and it’s now probably the most elegant math typography available anywhere.
5. Hide White Space at the Top and Bottom of the Page
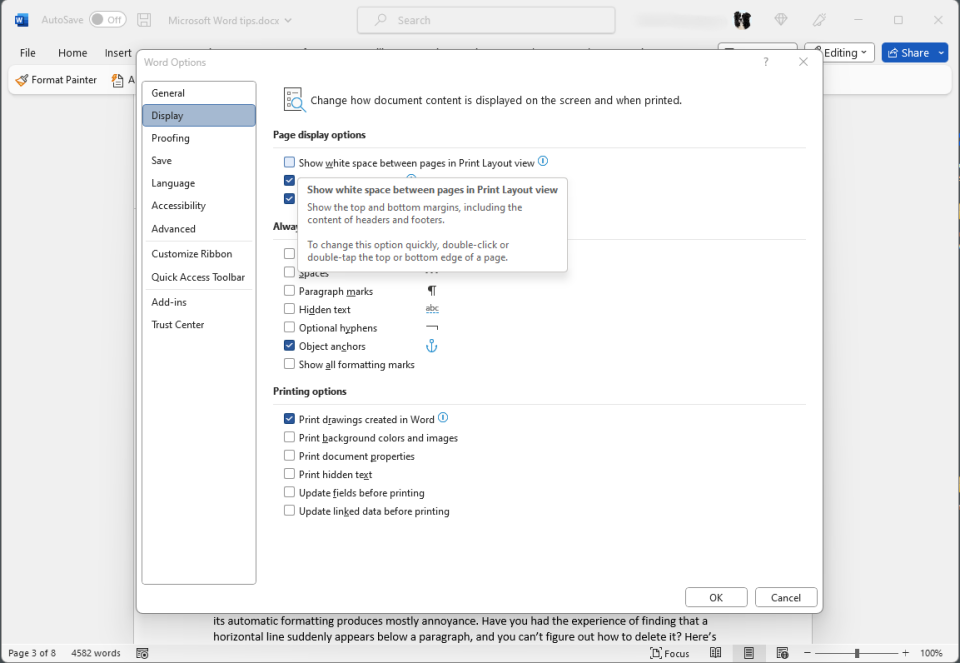 One major annoyance of almost all word-processing programs is the space they waste displaying the top and bottom margins of the page you’re typing. If a sentence extends across a page break, the first part of the sentence is separated by an inch or more of screen space from the second part of the same sentence. You can hide the page header and footer by double-clicking in the break between pages. In Windows, you can use File > Options > Display and remove the check-mark next to Show white space between pages in print layout view. On a Mac, you’ll find the option in Word > Preferences > View.
To save time, you can assign a command to a keystroke that will show or hide the white space between pages. Follow the technique in tip 9, above, and assign the command ViewTogglePageBoundaries to a key combination. I use Alt-zero, which Word doesn’t use for anything by default.
Get advanced email protection from infected attachments, suspicious links, phishing attempts, and email-based malware. Our newest service will harden your email system and put your organization in the best position to prevent potential threats. For more information contact us at [email protected] or give us a call at 732.780.8615.
Excerpt taken from Edward Mendelson, “24 Microsoft Word Tips to Make Your Life Easier”, pcmag.com, June 8, 2023