Microsoft Word tables are essential formatting tools. Find out how to make a table and format it perfectly with these simple tips.
You just cannot create beautiful Microsoft Word documents by cutting corners on tables. On Microsoft Word, tables are essential formatting tools. Microsoft Office has made it easier to create and format basic tables in Microsoft Word for Office 365, Word 2019, Word 2016, and Word 2013.
 Another quick way to create a table in Word is the Insert Control feature. You can create a new column or row with one click. Hover the mouse over a table. A bar appears right outside your table between two existing columns or rows. click on it when it appears, and a new column or row will be inserted at that position.
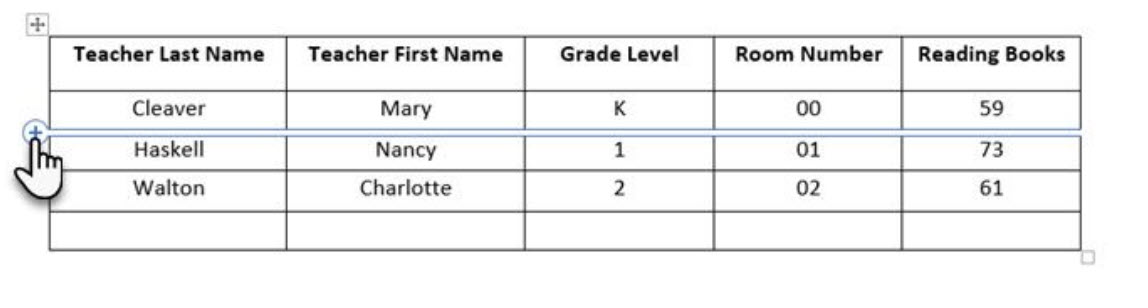 One more tip for creating a table is Word is by using your number pad.
- Begin by typing a plus sign ( + ), followed by minus signs ( – ) for the width of the column – repeat the pattern (+———-+) for the total of columns desired.
- End the row with a plus (+) and press enter to create the first row.
- To make more rows simply place your cursor in the last colum and hit the tab key.

How to Position Your Table on the Page?
Right-click on the table and select Table Properties from the context menu. The Table Properties dialog box is for precise control over the data and its display. Control the size, alignment, and indentation of the table.
By default, Word aligns a table on the left. If you want to center a table on the page, select the Table tab. Click on Alignment > Center.
The Indent from left figure controls the distance of the table from the left margin.

Position the table according to the text around it for a visually aesthetic look. Wrap text around tables by dragging it by the handle. The text wrapping changes automatically from None to Around. From the Table Positioning dialog box, you can set the Distance from surrounding text for each side of the table.
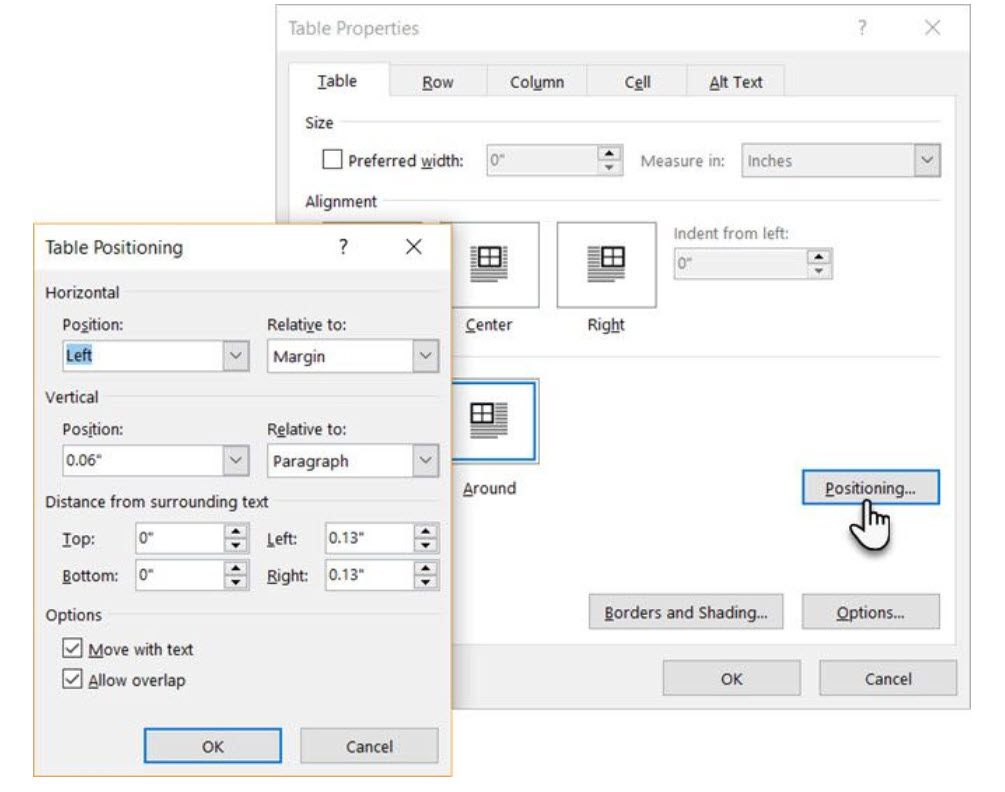
Select Move with Text if the text is directly related to the table data. The table is vertically aligned to the related paragraph around it. If the table data applies to the whole document, you can keep the option unchecked.
2. Use the Ruler
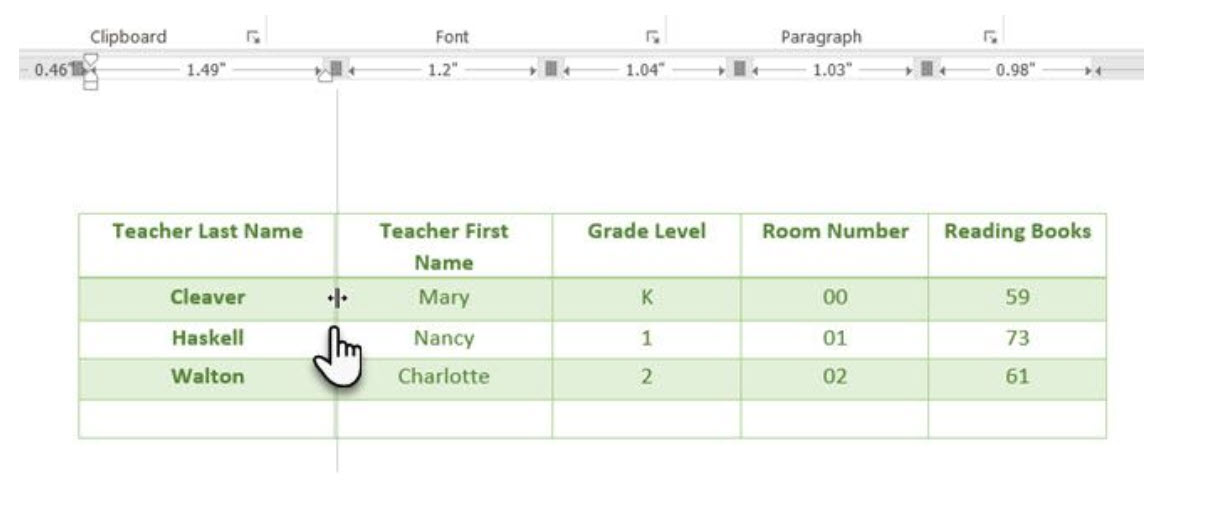
Sizing tables and positioning them accurately is an art in itself. If you need precise measurements to size your rows and columns—use the ruler.Hover the mouse over a border. When the double-arrow pointer appears, click the border and hold down the ALT key. Microsoft Word shows specific measurements on the ruler. Move the rows and columns to fit your measurements.
3. Convert Text to Table (and Vice Versa)
Tabular data gives information its structure. It would have been frustrating if Word didn’t have something to handle non-tabular data. You can convert data to tables instantly from the Insert Table command.
Select the text. Go to Ribbon > Insert > Table > Insert Table
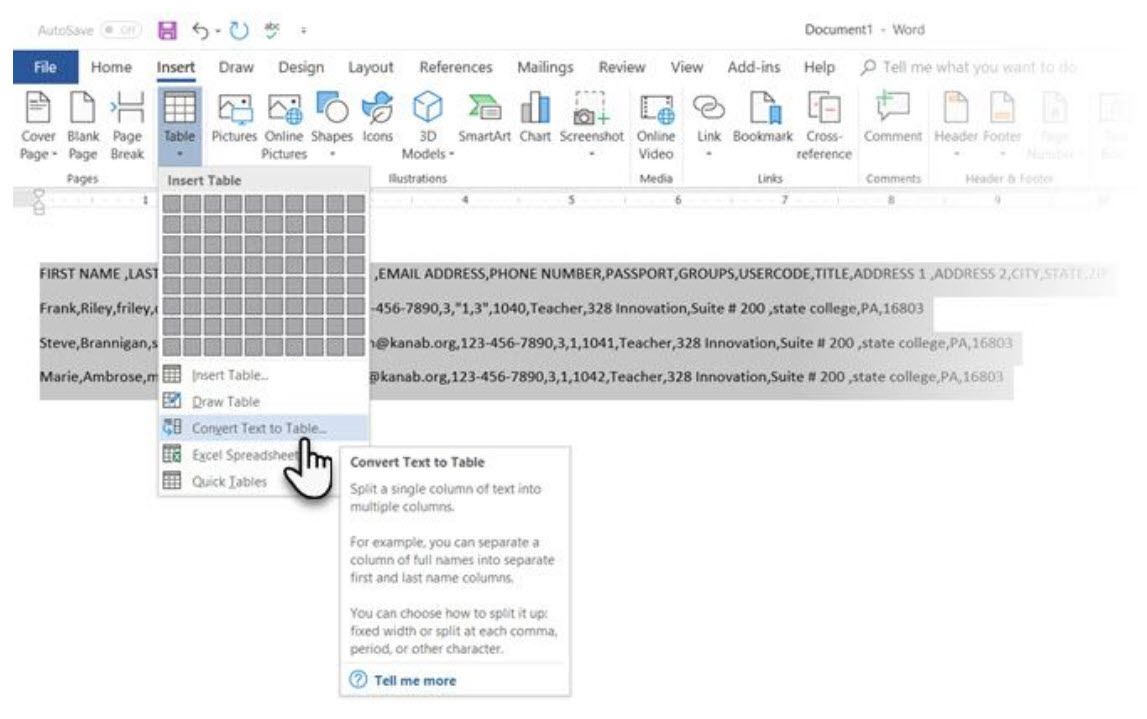
Microsoft Word determines the required number of rows and columns by considering the text separators and then auto-fits the contents. The Convert Text to Table dialog box allows you more control if the previous operation doesn’t work out right. You can also choose how to fit the contents of the table on the page.
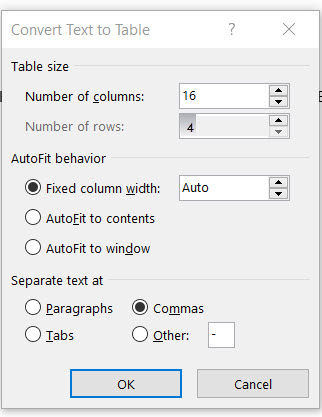
You can specify how Microsoft Word should separate the data into rows and columns. Paragraph, tabs, commas, or any other delimiting character. This allows you to easily import non-tabular data from CSV files or plain TXT files and convert them into formatted tables.
Convert Table to Text
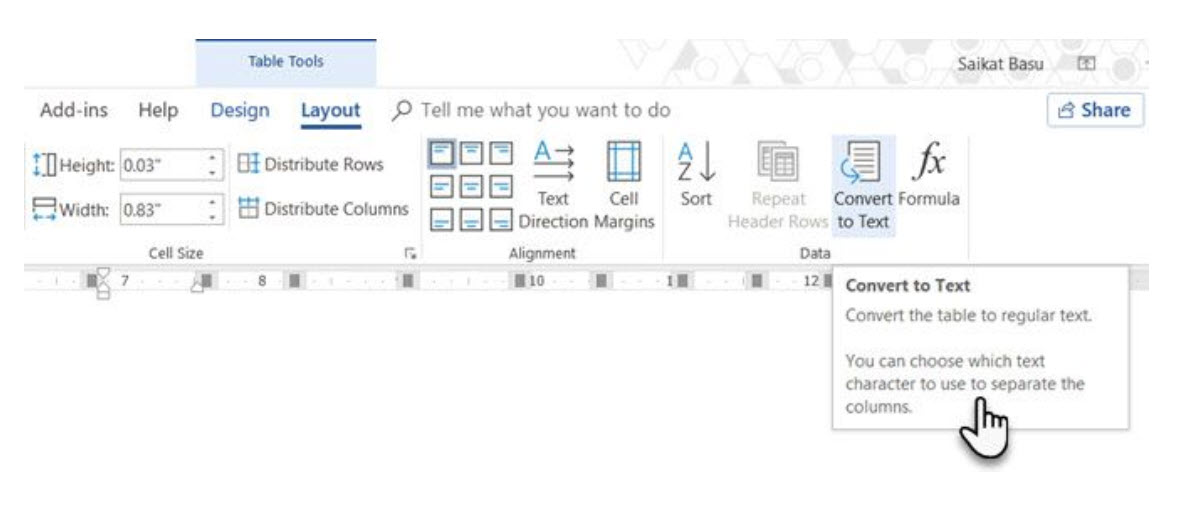
Engineer the reverse process if someone asks you to send them files with comma separated values or any other delineator. Select the entire table by clicking the “move” handle above the table.
Go to Ribbon > Table Tools > Layout > In the Data Group, click Convert to Text.
Simple text can be boring. When you have the chance, convert your table of data to a more visual chart instead with one of the underused features in Microsoft Word.
4. Auto-Fill Column Numbers
Microsoft Excel makes auto-filling a sequence of numbers very easy. Microsoft Word does not and you may have to resort to a manual job. There is a simpler way.
Create a new column for the serial numbers if it does not exist. Select this column by positioning the mouse over the column.
With the column selected, go to Home > Paragraph > Click the Numbering button for inserting a numbered list.

A number sequence is inserted in the column automatically.
5. Freeze Those Tables!
Microsoft Word tables change their dimension to accommodate new data. There may be times when you do not want the table to change size at all, even when new data is inserted. That is—“freeze” the size of cells.
The first step is to specify a fixed size for the cells. Go to Table Properties > Row > Enter a value in the Specify height box. For Row height is select Exactly from the dropdown.
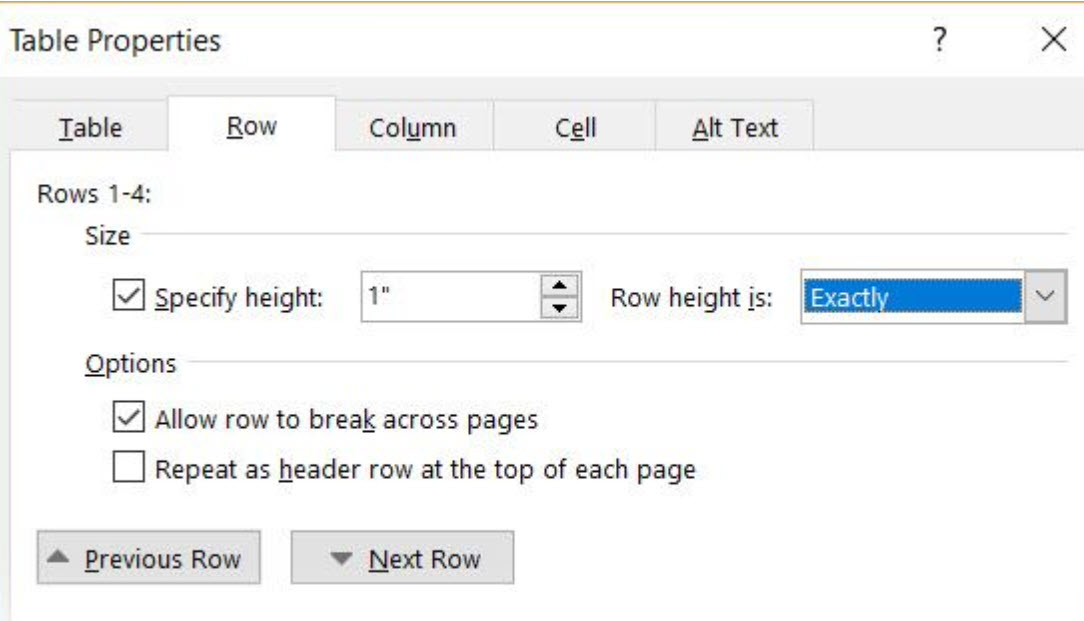
Now, select the Table tab > click the Options button > uncheck the Automatically Resize to Fit Contents check box.
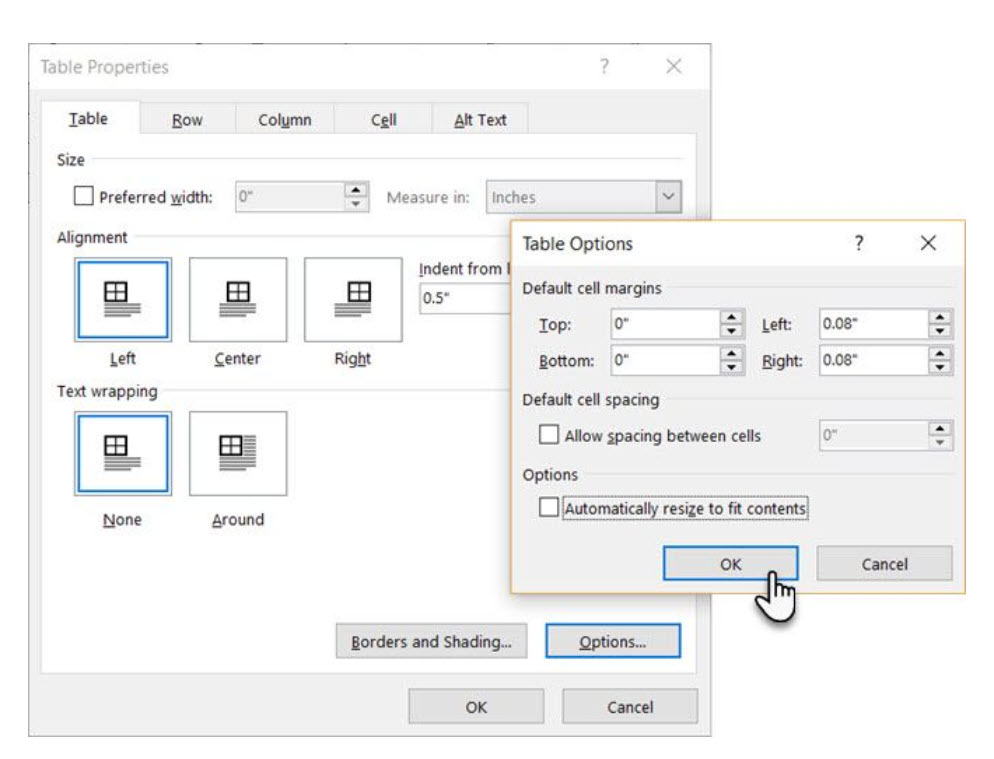
Click OK twice to exit the Table Properties dialog box.
This also solves the problem of inserting an image into a cell without the cell expanding to accommodate the image. If the image is bigger than the available space in the cell, it gets cropped to fit within the cell.
6. Change Rows Into Columns in a Table
There are situations where you have to change rows into columns and columns into rows. One possible scenario is where the number of columns exceeds the page margin. Switching columns around to rows and vice-versa is called transposition.
The bad news is that Word does not have an inbuilt method for handling this yet. Microsoft suggests that you copy-paste your table into Microsoft Excel and use its Transpose command. The transposed table can now be copy-pasted back into Microsoft Word.
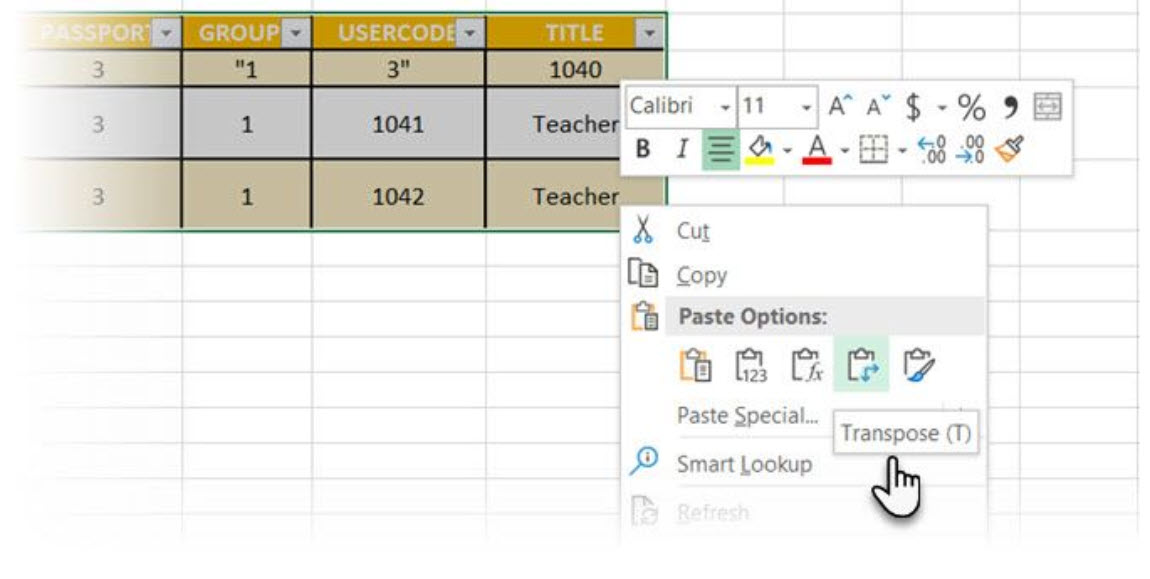
Dann shows how easy it is in Excel with this short tutorial on switching rows into columns. Also, take the help of Microsoft’s Support Page if you run into a problem using the Transpose command.
7. Paste Perfect Excel Tables into Gmail
You will find a use for this simple workaround. By default, Gmail does not retain the spreadsheet format when you paste from Microsoft Excel. To email tabular data without sending it as a separate attachment, use Microsoft Word as a bridge.
Select and copy-paste the Microsoft Excel table to a Microsoft Word document with the source formatting. Now, copy-paste from Microsoft Word to Gmail. As you can see from the screenshot, the problem is solved. You might have to tweak the more heavily formatted tables slightly, but most of the formatting is retained.
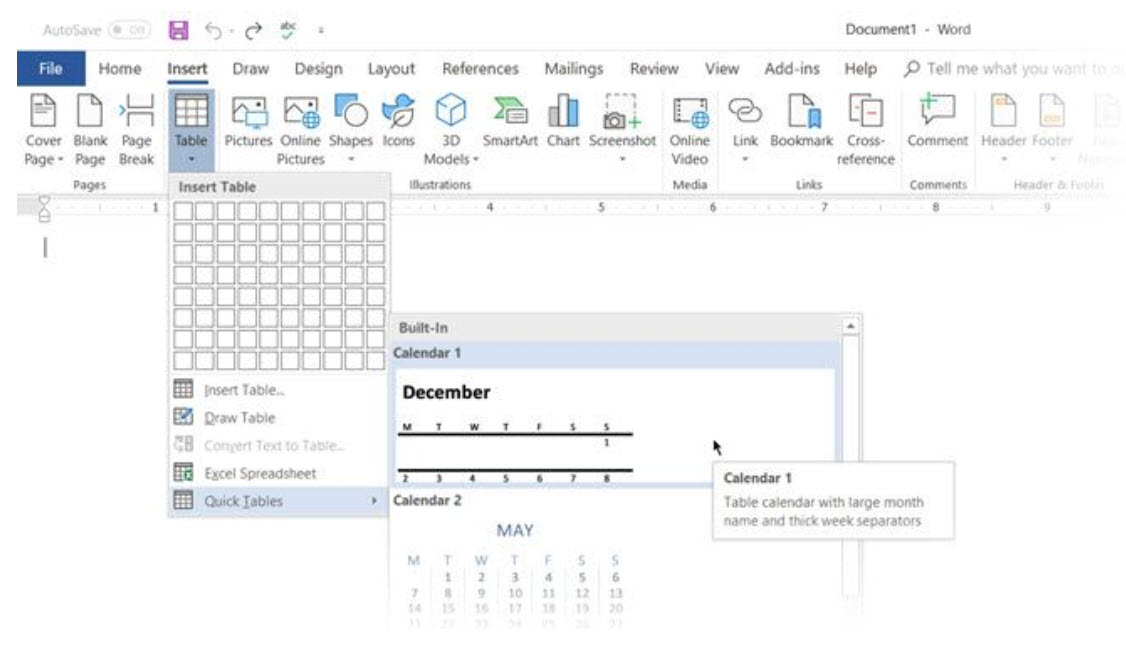
8. Reuse Your Tables to Save Time
You can save a lot of time by re-using tables when you create professional reports and documents. Save empty table formats and insert new data when required. With this quick save, you won’t have to recreate the layout from scratch for new data.
Select a table. Go to Ribbon > Insert > Text group > click Quick Parts > Save Selection to Quick Part Gallery.
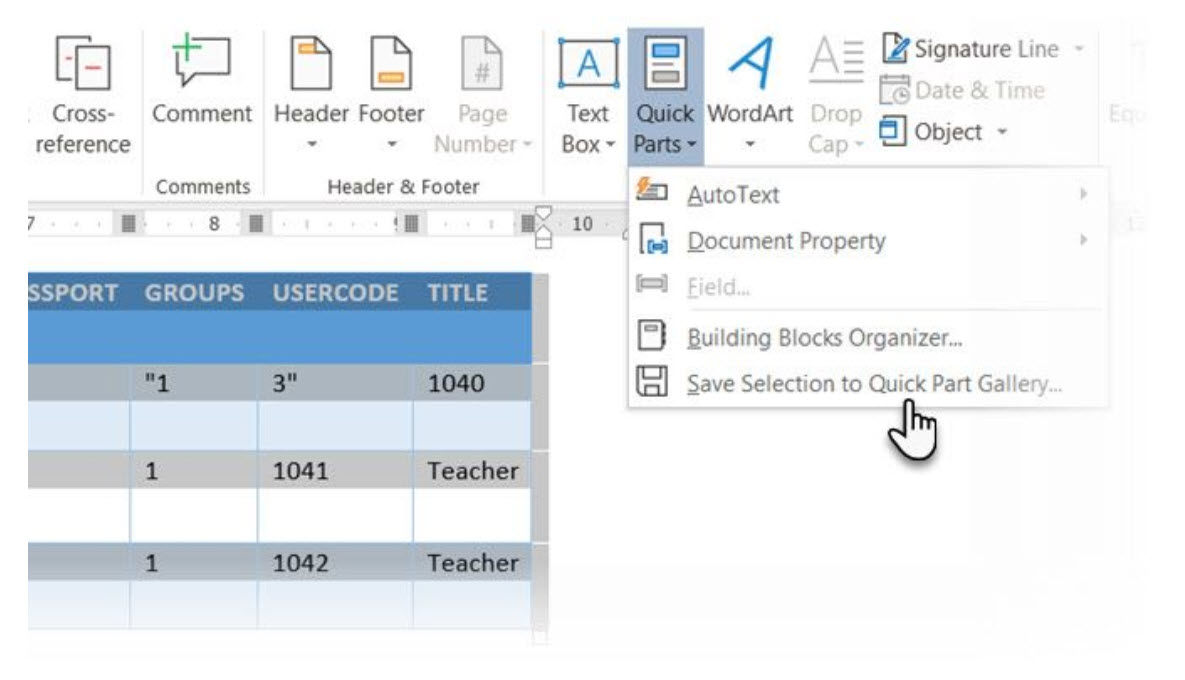
After you save a selection to the Quick Part Gallery, you can reuse the selection by clicking Quick Parts and choosing the selection from the gallery.
Use the Building Blocks Organizer to preview any table you created. You can also edit properties and delete the tables from here.
Basu,Saikat. “8 Formatting Tips for Perfect Tables in Microsoft Word” Make use of
HBN Infotech Tutorials – “33 Magical secrets, tips and tricks of Microsoft Word You don’t know”