 Whether you’re adding a blank signature line or a picture of your real signature, the process is made easy by Word.
Nothing will replace a real signature, but in today’s digital world, electronic signatures are common and easy. You can use specialized software when signing agreements and contracts, but Microsoft Word can also help.
You can add an empty signature line for more legal documents or create an AutoText item from a picture of your real signature. Both are easy to implement and offer a bit of freedom regardless of whether the document is distributed electronically. In this article, I’ll show you how to implement both methods.
Neither method is a secure process nor takes the place of encrypted digital signatures that require certification–which is another thing entirely.
For a demo, download a Word letter template or you can work with any Word document. There’s no demo file download here because you won’t need one. This feature isn’t supported by the older .doc format, and either signature technique is supported by the browser edition.
How to add a blank signature line in Word
If you’re going to print the document, you can quickly add all of the pertinent information that goes along with the real signature by inserting a signature line. Doing so adds a place to sign the document and includes other information such as the title, email, phone number, and so on. This feature is helpful with forms, but it’s less helpful with an ordinary letter.
To add a signature line to a document, do the following:
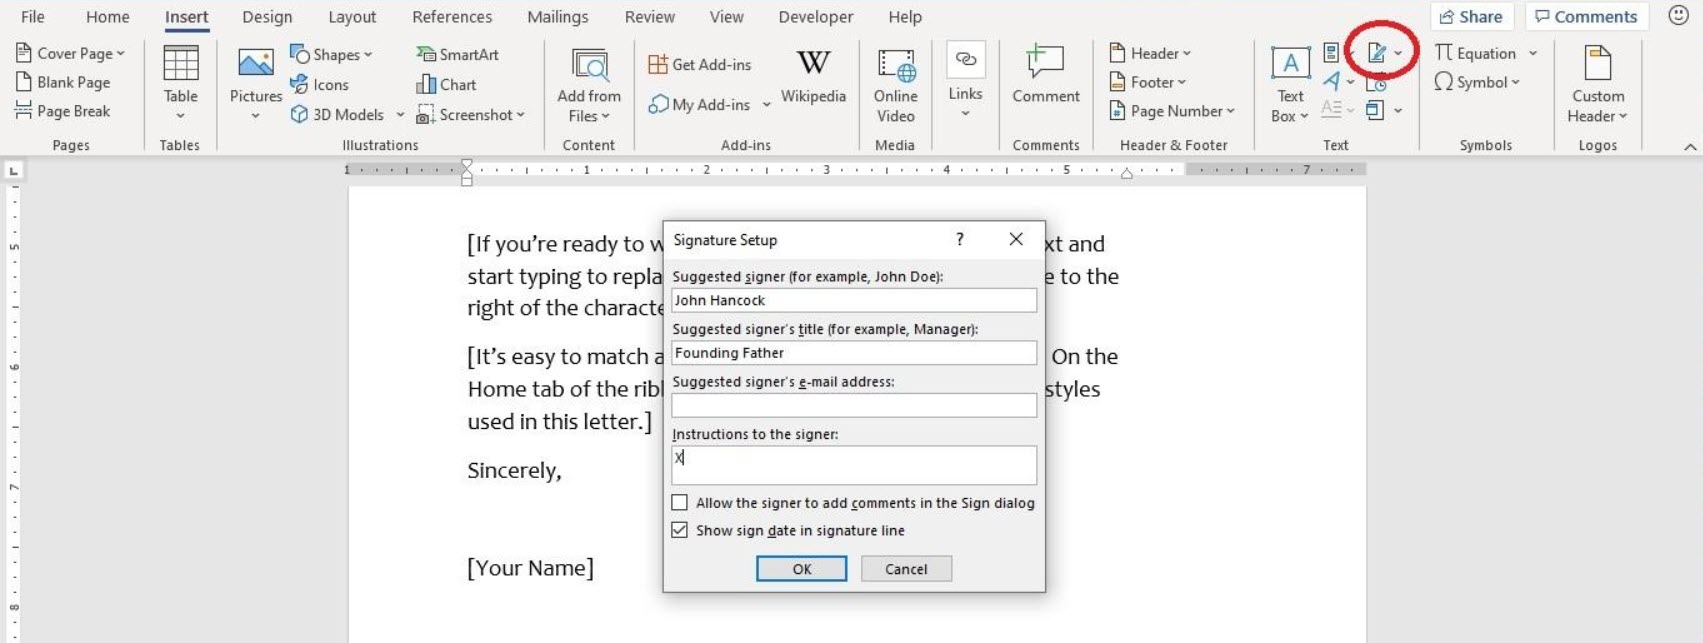
- Click the Insert tab and then click the Signature Line option in the Text section.
- In the resulting dialog, enter the signature details, such as name, title, etc. (Figure A). In the instructions field, you can even include help for the signer, such as “Please sign here” or the familiar “X.”
- Click OK to insert the signature line.
Figure A
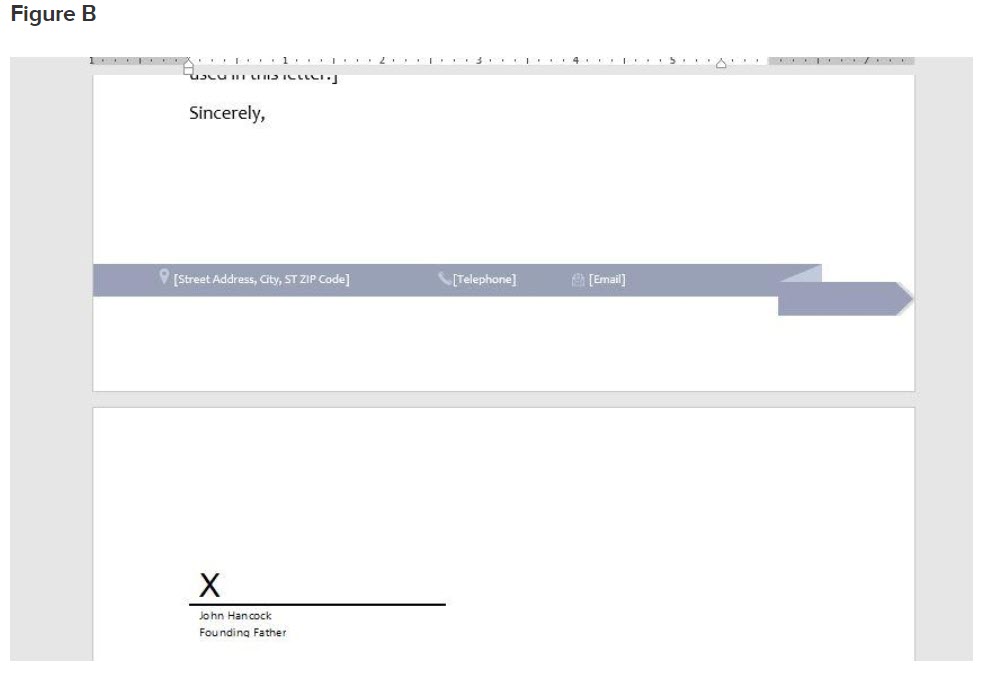
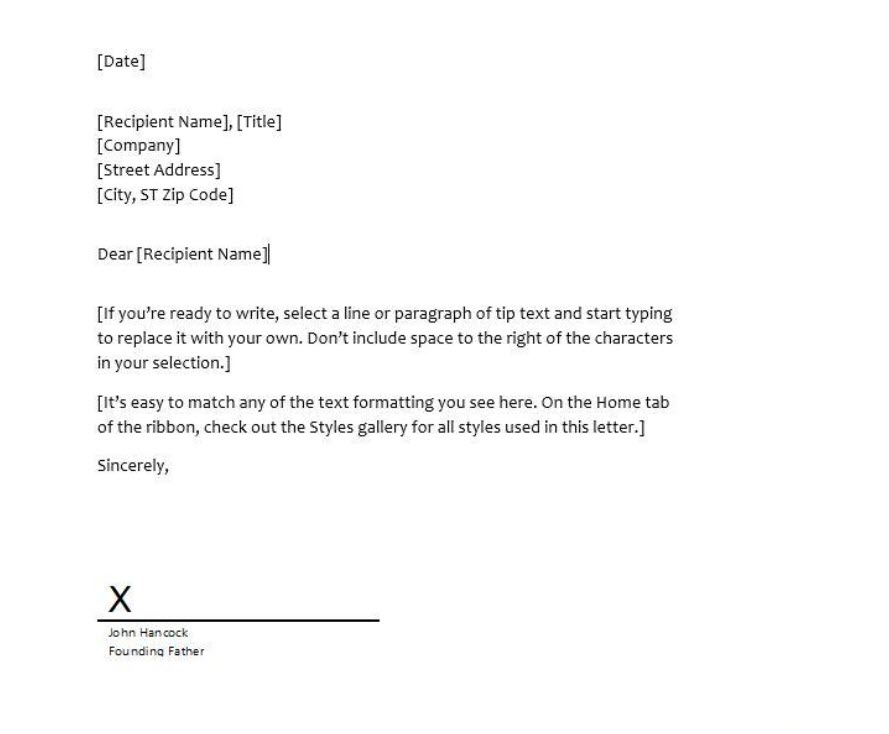
As you can see in Figure B, there’s not enough room on the first page, so Word puts the entire signature line on page 2. This might not happen to you, but when it does, remove a few blank lines from the previous page to pull the signature onto that page. If this is impossible, move the last paragraph or last several lines to the signature line page. You don’t want a signature line on a page by itself. After tweaking the placement (Figure C) if necessary, you’re ready to save, print, and distribute.
We’ve used a template letter for the demo file, but most likely, you’ll use this feature on legal documents and so on, and not one-off letters. Regardless of how you use this feature, someone still has to actually sign the document. Let’s take a look at an option that eliminates that need.
Figure C
How to insert a picture signature as AutoText in Word
Adding a picture of your signature is an easy way to eliminate the need to actually sign things. Just print it out and go. You’ll want to be careful who you share this capability with, of course, and whether it’s legally binding is something for you to determine, if that’s important to you.
The first thing you need is your handwritten signature as a graphic file. Write your signature on a piece of paper and scan it or take a photo of it, saving it with one of the graphic file formats: .bmp, .gif, .jpg, or .png.
Insert the picture file in Word by clicking the Insert tab and choosing Pictures in the Illustration group. Select the device, find the file, and then click Insert. Resize and crop if necessary, to remove large amounts of white space (background). Then, enter any additional text, such as the name printed and title. Once you have everything you need for the signature, it’s time to turn it into an AutoText item.
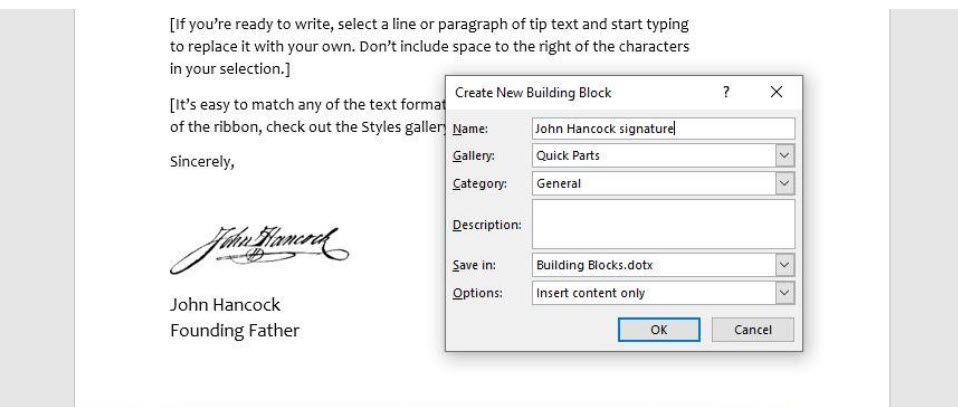
Select the graphic and the additional text and then do the following:
- Click the Insert tab and then click Quick Parts in the Text group.
- Choose Save Selection to Quick Part Gallery.
- In the resulting dialog, enter a name for the AutoText item.
- The other settings will depend on your working situation. For example, you could save different signatures with specific template files. For our example, retain all of the default settings (Figure D).
- Click OK.
Figure D
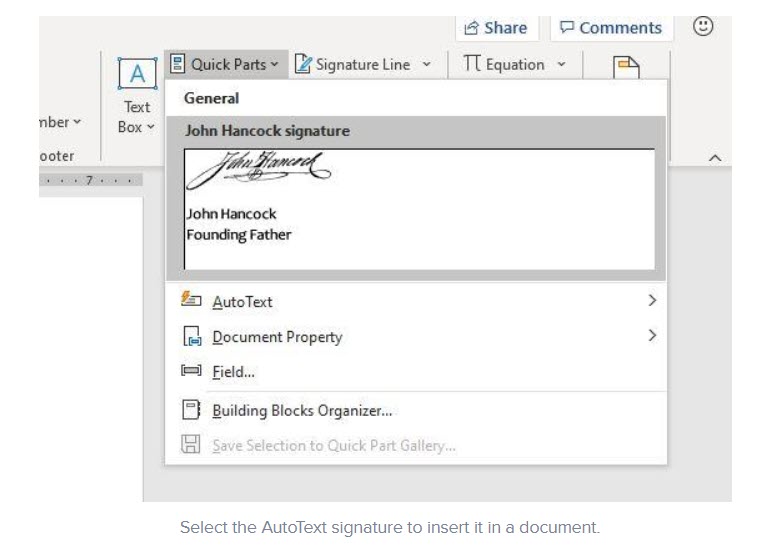
Now that the AutoText signature item exists, you can insert it anywhere at any time. Click Quick Parts and choose the item from the gallery (Figure E). Because we retained the default settings, this AutoText item is available in all documents based on the Normal template.
Figure E
Harkins, Susan. “How to add an automated signature in Microsoft Word” TechRepublic.com April 2020